When you buy a spotting scope, start with how you’ll use the spotting scope, because birding, target work, and landscape viewing demand different balances of magnification, brightness, and field of view.
You’ll also need to weigh objective lens size, glass quality, eye relief, and weather sealing against weight and tripod stability.
The right choice isn’t the most powerful one, but the one that stays usable when conditions change.
Key Takeaways
- Match magnification, field of view, and close-focus ability to your intended use, whether wildlife, range spotting, or marine viewing.
- Choose objective lens size and glass quality for the brightness, contrast, and color fidelity you need in your typical lighting.
- Consider zoom versus fixed power, and pick eye relief and exit pupil that suit your viewing comfort, especially with glasses.
- Look for strong weather sealing, armor coating, fog resistance, and rugged construction to protect the scope in real conditions.
- Ensure the scope is compatible with a stable tripod, and balance portability, weight, and carrying convenience for daily use.
How Will You Use a Spotting Scope?
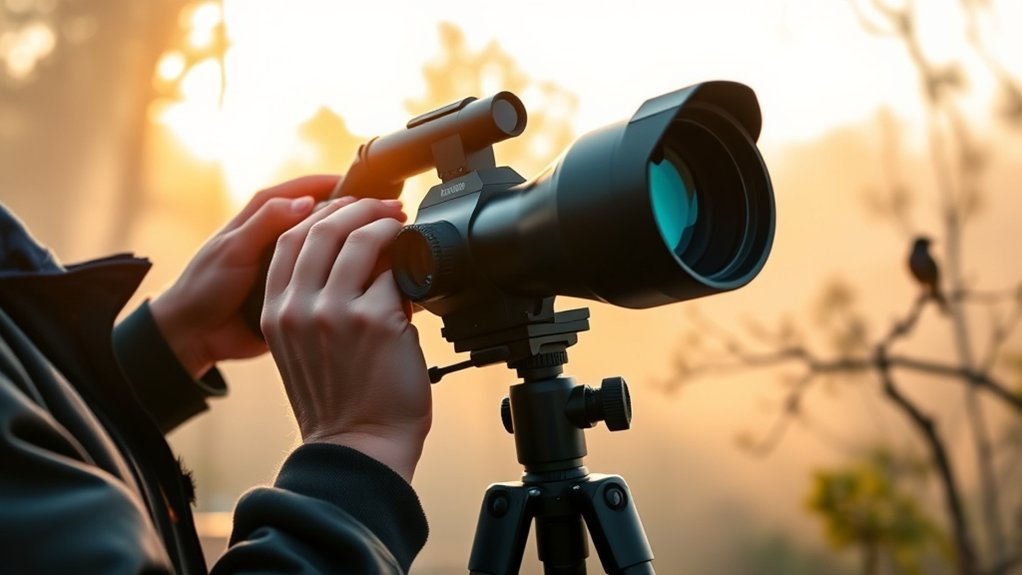
How will you use a spotting scope? You need to match the instrument to your task before you buy. If you’ll observe birds, wildlife, or distant landscapes, prioritize a stable image and a wide field for easy target acquisition.
Match the spotting scope to your task first; for birds or landscapes, choose stability and a wide field.
If you’ll inspect bullet holes or read fine detail, you need sharp edge-to-edge resolution and a close focus distance. For marine or roadside viewing, weight, weather sealing, and quick deployment matter more than extreme size.
When you evaluate how to use the scope, consider where you’ll set it up, how far you’ll carry it, and how often you’ll adjust it. A compact body helps with transport, while a full-size optic usually offers better handling on a tripod.
Your spotting scope setup should include a sturdy mount, a smooth head, and an eyepiece that matches your viewing distance. Define the job first, then choose features that support that exact use case.
Spotting Scope Magnification: What Range You Need
When you choose spotting scope magnification, match the power range to your primary use, because the right balance between field of view, image brightness, and target detail depends on distance and conditions. For general wildlife or range use, a moderate zoom range usually gives you enough flexibility.
Higher magnification helps only if your tripod and optics can hold resolution. You’ll also need to decide whether a zoom eyepiece or a fixed-power model better fits your need for versatility versus optical simplicity.
Choosing Magnification Range
What magnification range do you actually need in a spotting scope? You need a range that preserves detail without making the image unstable or dim. A 20-60x zoom covers most users, while a fixed 30x can deliver sharper, brighter views if you want simpler optics.
Check how the eyepiece feels in use; spotting scope ergonomics affect eye relief, focus control, and fatigue during long sessions. Also verify accessory compatibility, because some ranges work better with specific tripods, digiscoping adapters, and angled viewing bodies.
- A distant ridge rendered crisp at 30x
- Fine feather patterning held at 45x
- A shimmer-free target image under stable light
- A compact field setup with balanced controls
Matching Power To Use
The power you choose should match the way you’ll actually use the scope, not just the highest number on the dial. If you glass birds at close range, 20x to 30x gives a wide field and steadier image.
For target shooting or long-distance spotting, 45x to 60x helps you resolve small details, but only when your tripod and atmospheric conditions support it. Higher magnification narrows the view, magnifies shimmer, and reduces brightness, so you should choose enough power to identify your subject without sacrificing usability.
Consider how often you’ll scan versus inspect, and whether compactness matters alongside battery life and color options for your setup. Match magnification to distance, lighting, and support equipment, then test it in the field before you commit.
Zoom Versus Fixed Power
A zoom eyepiece gives you flexibility, letting you change magnification as distance, light, and target size change, while a fixed-power scope gives you a simpler optical path and often a brighter, sharper image at one specific setting. In zoom versus fixed power, you trade versatility for peak optical efficiency.
Use zoom when you scan mixed distances, follow wildlife, or adjust quickly in changing conditions. Choose fixed power when you want maximum contrast, fewer moving parts, and consistent edge sharpness.
You’ll usually carry less complexity with fixed power, but you must pick the right magnification up front.
- Distant raptor on a thermal ridge
- Faint target in fading evening light
- Rock-solid tripod at maximum detail
- Bright, crisp image through fewer lenses
Objective Lens Size: How It Affects Brightness
When you choose a larger objective lens, you let more light reach the eyepiece, which boosts brightness in low-light conditions. That extra light-gathering capacity can also improve image quality by preserving contrast and fine detail, especially at higher magnifications.
You’ll need to balance objective size against weight and portability, since a bigger lens usually means a larger, heavier scope.
Brightness and Light Gathering
Objective lens size directly affects how much light a spotting scope can gather, which in turn influences image brightness, contrast, and low-light performance. When you compare models, use a brightness comparison based on objective diameter and stated light transmission.
You’ll notice that larger lenses present a brighter view at dusk, in shade, or over water, where ambient light drops fast. To visualize the difference, picture:
- a bird on a dark reed line at sunrise
- antlers half-hidden in forest shadow
- shoreline details under overcast skies
- target marks fading near sunset
Higher light transmission helps more of the captured light reach your eye, so you can detect fine detail with less strain. Choose the largest objective lens you can carry comfortably for your typical viewing conditions.
Lens Size and Image Quality
Lens size affects more than just brightness; it also shapes how much fine detail you can resolve at a given magnification. You’ll usually get better image quality from a larger objective because it admits more light, supports a wider exit pupil, and reduces dimming at higher power.
That doesn’t mean bigger is always better: optical design, glass quality, coatings, and alignment still control contrast, edge sharpness, and color fidelity. If you choose a 60 mm scope over a 50 mm model, you may notice cleaner detail in low light, but only if the lenses and prism system are well executed.
Compare lens size with weight, portability, and intended use, since a large objective can improve performance while making the scope less practical to carry.
Glass Quality and Lens Coatings

How much detail a spotting scope reveals depends heavily on the quality of its glass and the coatings applied to its elements. You should favor extra-low dispersion glass because it reduces chromatic aberration, keeps edges sharp, and preserves natural color fidelity at high magnification.
Favor extra-low dispersion glass; it reduces chromatic aberration, keeps edges sharp, and preserves natural color fidelity.
- A bright reed line against dark water
- Fine feather barbs on a distant bird
- Crisp masonry edges on a far ridge
- True-white highlights under hard sun
Coatings matter just as much. Multi-coated and fully multi-coated optics use glossy coatings and AR coatings to cut reflections, boost light transmission, and improve contrast. That means you’ll see dim targets with less glare and better separation between subject and background.
High-quality coatings also resist ghosting when you aim near bright sky or reflective surfaces. When you compare models, inspect the lens description closely; better glass and coatings usually deliver a cleaner, more usable image than extra magnification alone.
Straight vs. Angled Spotting Scopes
Straight or angled, the eyepiece layout changes how you use the scope in the field. With a straight model, you line up targets quickly, making it efficient for tracking moving animals, scanning from a vehicle, or sharing a target with a partner at the same height.
You also point the objective directly at what you’re observing, which can simplify setup. An angled model lets you keep the tripod lower while still looking upward, so you can observe from ridgelines, blinds, or uneven ground with less neck strain.
For long glassing sessions, that ergonomic advantage often matters more than speed. When you compare straight vs angled designs, focus on how you’ll carry and position the scope, not just how it looks.
Weight and durability also matter: angled bodies sometimes pack a little easier, while straight tubes can feel more intuitive and rugged in fast-moving field use. Choose the layout that matches your typical viewing angle and support setup.
Eye Relief and Exit Pupil Explained

Eye relief determines how far your eye can sit from the eyepiece while still seeing the full image, and it matters most if you wear glasses or want a more forgiving viewing position. You should look for at least 15 mm of eye relief for comfortable glassed viewing, though 18 mm or more feels better during long sessions.
Longer eye relief reduces vignetting and helps you keep the image centered without pressing into the scope.
The exit pupil is the beam of light leaving the eyepiece; you calculate it by dividing objective diameter by magnification. A larger exit pupil gives you a brighter, easier-to-acquire image, especially at dawn or dusk.
A wide eyepiece window floating before your glasses
A bright disk of light centered in darkness
A steady, relaxed gaze behind the scope
A sharp target emerging from dim reeds
Durability and Weatherproofing
When you evaluate durability, check the armor coating first, since it protects the body from impact, abrasion, and handling wear. You should also confirm the scope has a waterproof sealed body, because reliable gasket and O-ring sealing keeps moisture out during rain or splashes.
Fog-resistant optics matter too, since internal nitrogen or argon purging helps prevent condensation from degrading image clarity in rapid temperature changes.
Armor Coating Protection
Armor coating protects a spotting scope’s exterior from impact, abrasion, moisture, and temperature swings, so it’s a key factor in long-term durability. You should examine the armor coating for dense rubber or polymer coverage, because it cushions knocks and resists scuffs during transport.
A quality finish also adds UV protection, helping the outer shell avoid fading, hardening, or cracking after long sun exposure. Look for a texture that improves grip without collecting grit.
- A ridge-lined barrel resting on rock
- A gloved hand gripping matte rubber
- Sunlight striking a nonreflective housing
- A scope sliding into a padded case
Waterproof Sealed Body
Even the best exterior armor can’t compensate for a scope that isn’t fully sealed against the elements. You should verify that the body uses waterproof seals at every joint, focus control, and eyepiece interface, because even minor ingress can damage internal components.
A properly built housing uses rugged construction with tightly machined tolerances, reinforced chassis points, and corrosion-resistant fasteners. You’ll also want to inspect the O-ring design and the way the manufacturer rates submersion or heavy rain exposure, since these details indicate real-world protection.
A sealed body keeps out moisture, dust, and debris during transport and field use, so your scope stays mechanically stable. If you hunt, birdwatch, or glass in harsh weather, this level of environmental protection isn’t optional; it’s essential.
Fog Resistant Optics
Fogging control matters because temperature swings can quickly cloud the internal lens surfaces and cut image contrast at the worst possible moment. You should verify fog resistance by checking for nitrogen or argon purging, which displaces moisture-prone air inside the optical tube.
Quality anti fog coatings on exterior glass help shed condensation faster, so you keep a sharp view when humidity rises.
- Cold dawn air over a wet marsh
- Warm breath near the eyepiece
- Rain beading on coated lenses
- A clear target through shifting weather
When you compare models, inspect seals, O-rings, and lens-cell fit for consistency. Better construction keeps internal elements stable, preserves contrast, and lets you trust the scope during rapid weather changes.
Tripod Compatibility and Stability
Tripod compatibility is critical because even a sharp spotting scope becomes frustrating if the support system flexes, twists, or won’t hold its position under load. You should verify the tripod head matches the scope’s mounting threads and plate style, because mismatched mounting options create play and reduce tripod stability.
Look for a rigid head with smooth pan and tilt resistance, so you can track targets without image bounce. Check the connection hardware for metal inserts, secure locking knobs, and minimal slippage under torque. A well-designed quick-release platform helps you attach the scope repeatably while preserving alignment.
You also want legs with enough torsional stiffness to resist vibration when wind or focus adjustments add stress. Test the setup by extending the scope, locking the head, and applying light lateral pressure; if it drifts, the system isn’t stable enough. Prioritize firm interfaces, precise fit, and load control for reliable viewing.
Size, Weight, and Portability
Once you’ve confirmed the scope can mount securely, consider how its size and weight will affect everyday use. A compact body reduces fatigue when you carry it between blinds, vehicles, or ridge lines, while a larger objective often improves image brightness but adds bulk.
Check the size and weight against your normal loadout, especially if you hike long distances or glass from a standing position. Portability and balance matter because a scope that’s nose-heavy or awkward to grip slows setup and increases strain.
- A short, dense tube resting in your pack
- A balanced body centered over the tripod head
- A slim profile slipping easily past branches
- A heavy front end dipping under one hand
You want dimensions that match your field routine, not just your vehicle. Test how the scope feels with eyepiece, sunshade, and mounting plate installed, since real-world carry weight can differ from the spec sheet.
How Much to Spend on a Spotting Scope
How much should you spend on a spotting scope? You should match price to intended use, optical requirements, and durability needs. For casual birding or range spotting, entry models around $150 to $300 can work, but you’ll accept narrower field of view, softer edge sharpness, and less effective low-light performance.
Match spotting scope price to your use: entry models work for casual viewing, with tradeoffs in clarity and light performance.
Midrange scopes, typically $300 to $800, usually deliver better coatings, tighter mechanics, and more consistent resolution. If you need long-distance clarity, waterproof sealing, and stronger eye relief, premium models above $800 often justify the cost.
Use budget planning to set a ceiling before comparing features, then perform brand comparisons on glass quality, warranty coverage, and accessory value. Don’t overspend on magnification alone; resolution, exit pupil, and tripod stability matter more.
Choose the least expensive scope that still meets your performance threshold, because extra money should buy measurable optical gains, not marketing claims.
Frequently Asked Questions
How Do I Clean a Spotting Scope Lens Safely?
Use a blower first, then brush off grit. Apply a microfiber cloth with lens-safe cleaner sparingly, using circular strokes. You’ll protect coatings by avoiding pressure, paper products, and solvents. Smart cleaning techniques for lens coatings care.
Can I Use a Spotting Scope for Astronomy?
Yes, you can use a spotting scope for astronomy, especially the Moon and bright planets. Check spotting scope astronomy performance, and verify eyepiece compatibility, because higher magnification, stable mounting, and aperture limit faint deep-sky detail.
Do I Need Special Eyepieces for My Scope?
Usually, you don’t need special eyepieces; many scopes use fixed, integrated optics. In fact, 80% of users prefer standard compatibility.
You’ll mainly care about field of view, magnification, and whether your scope accepts interchangeable special eyepieces.
How Important Is Field of View in a Spotting Scope?
It’s very important: wider field of view helps you locate targets faster and track movement, while reducing frustration. You’ll trade some bokeh vs magnification, and edge distortion can increase as you push higher power.
What Accessories Should I Buy With a Spotting Scope?
You’ll want accessories to contemplate: a sturdy tripod, waterproof cover, lens caps, and a padded case.
Pricing considerations matter, because reliable eyepieces, adapters, and cleaning kits can quietly guard your scope like loyal sentries.
Conclusion
When you choose a spotting scope, you’re really choosing a bridge to a distant world. If you match its magnification, objective size, glass quality, and body style to your task, the image stays bright, stable, and true.
A well-sealed, tripod-ready scope is like a sturdy watchtower: it lets you observe longer with less strain. Pick the model that balances portability, durability, and optical performance, and you’ll see farther with confidence.
In the end, selecting the right spotting scope ensures you enjoy clear, detailed views no matter the distance.