Yes, you can bore sight a thermal rifle scope, but it’s important to understand that this only provides a rough mechanical alignment, not a final zero.
You’ll need a stable rest, solid mounting torque, and a visible heat source to line up the reticle with the bore axis.
Thermal optics introduce a few variables that can affect accuracy.
Because of these factors, the real test still comes at the range.
The details matter more than you might expect.
Key Takeaways
- Yes, you can bore sight a thermal rifle scope to get your first shots close to the target.
- Bore sighting with thermal scopes is only a rough alignment, not a substitute for live-fire zeroing.
- Use a stable rest, correct mounting torque, and a clean, calibrated thermal optic before starting.
- Align the bore with a distinct heat source, then adjust windage and elevation until the reticle matches.
- Confirm the zero at the range with three to five rounds, then make small corrections as needed.
What Thermal Scope Bore Sighting Means

Bore sighting a thermal rifle scope means aligning the scope’s line of sight with the rifle’s bore so your first shots land close to the target. You use bore sighting basics to reduce initial zeroing error, not to replace live-fire confirmation.
With thermal imaging basics, you understand that the display shows heat contrast, so a stable aim point may look different than in a daylight optic. You check that the reticle and bore point reference the same target distance, then make small mechanical adjustments.
This process saves time, ammo, and guesswork when you begin zeroing. It also helps you verify mounting alignment, sight height, and turret movement before you shoot.
Can You Bore Sight a Thermal Scope?
Yes, you can bore sight a thermal scope, but not in exactly the same way you’d bore sight a daylight optic. You use the rifle’s bore axis as a reference, then compare that line to the thermal image’s point of aim.
Because thermal scope optics don’t rely on visible light, you won’t align crosshairs with a bright target edge or traditional reticle image in the same way. Instead, you confirm the scope is mechanically centered and that the rifle’s barrel and reticle are roughly aligned before live fire.
That’s why bore sighting myths often mislead shooters who expect a perfect zero from the process. Bore sighting only gets you close; it doesn’t replace confirmation at the range. You still need to fine-tune point of impact through actual shot placement.
Tools You Need for Thermal Bore Sighting
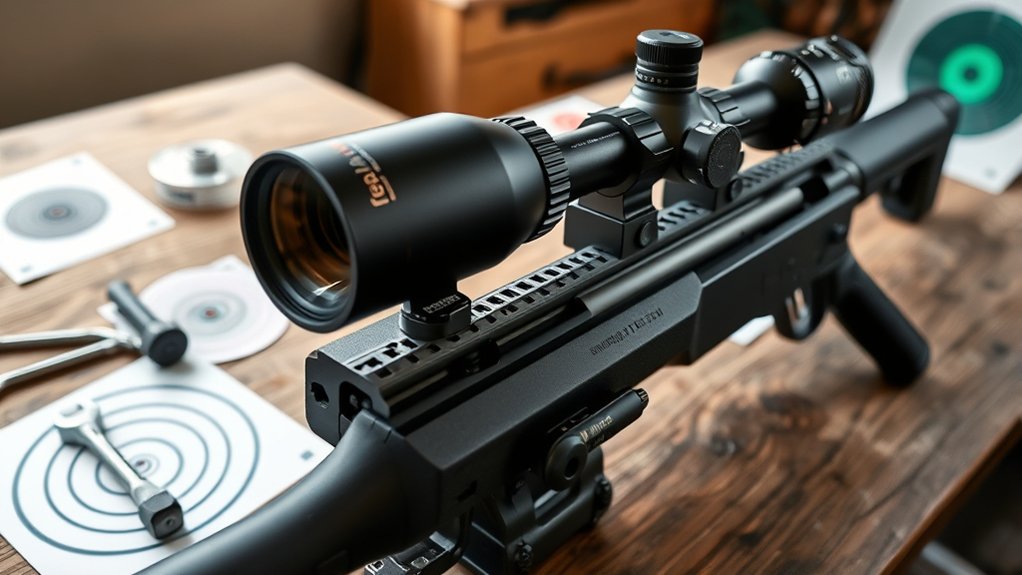
To bore sight a thermal rifle scope effectively, you’ll need a stable rest, a proper mounting setup, and a reliable reference for the bore line. Use a solid vise, sandbags, or a gun cradle to keep the rifle motionless.
You’ll also need the correct mount, a torque driver, and the right hex tools so the optic sits squarely on the rail. A bore guide or laser reference can help you align the barrel axis without guesswork.
A clean lens cloth and battery check matter too; poor thermal scope maintenance can distort your view. Don’t trust bore sighting misconceptions that treat every thermal optic like a daytime scope. Thermal units rely on sensor alignment, so precision tools matter more than improvisation.
How to Bore Sight a Thermal Scope
Start by securing the rifle in a stable rest and confirming the scope is mounted straight and torqued to spec. Then power on the thermal optic, let thermal scope calibration finish, and set the image to a clean, high-contrast view.
Remove the bolt or open the action so you can look through the bore, then align the barrel on a distinct heat source at a short range. Adjust windage and elevation until the reticle matches the bore line.
| Step | Action |
|---|---|
| 1 | Stabilize rifle |
| 2 | Verify mount alignment |
| 3 | Calibrate thermal scope |
| 4 | Match reticle to bore |
Don’t trust bore sighting misconceptions that suggest this replaces live-fire zeroing. It only gets you pointed correctly before fine adjustment.
How Close Bore Sighting Gets You

Bore sighting usually gets you close enough to put your first shots on paper, but it won’t guarantee a precise zero. You’ll often be within a usable adjustment range, though the exact offset depends on the rifle, mount, and thermal optic setup.
You still need final zero verification at the range to confirm point of impact and make the last corrections.
Initial Zero Proximity
How close does bore sighting really get you? It usually places your thermal scope near paper, not dead center. You’re aligning the optic to the bore’s axis, so the first shot lands within a useful search area.
That doesn’t guarantee a hit, but it trims wasted rounds and time. Bore sighting myths suggest it replaces live firing; it doesn’t. Thermal reticle symbolism only shows where the system thinks impact should occur, not where your rifle will print.
| Step | Result | Note |
|---|---|---|
| Align bore | Near target | Mechanical reference |
| Check reticle | Close POI | Optical estimate |
| Fire group | Confirm zero | Real-world validation |
You still need a live-fire confirmation to establish true initial zero proximity.
Typical Adjustment Range
Typically, bore sighting puts your thermal scope within the rifle’s adjustment range, but not necessarily at a usable zero. You’ll usually need only modest turret correction, often a few mils or several MOA, depending on bore alignment and mount quality.
Thermal displays can shift perceived impact if contrast lighting changes or your camera settings alter scene detail, so don’t chase a perfect visual match.
- Expect coarse corrections, not fine zero.
- Keep the rifle stable during adjustment.
- Use consistent targets and distances.
- Recheck reticle movement after each change.
If your scope starts far off, inspect mount torque, rail fit, and bore-sight method before making large adjustments. Bore sighting gets you close enough to start dialing, saving time and ammunition during your first live-fire confirmation.
Final Zero Verification
At this stage, you still need to verify the final zero on paper or steel at a known distance, because bore sighting only gets you close enough to start. Use a stable rest, fire a measured group, then adjust in small increments until point of impact matches point of aim.
Thermal sensors, reticle offsets, and mounting tolerances can still shift impact after bore alignment. Don’t trust bore sighting myths that claim a laser or visual bore check equals a true zero. It doesn’t.
Confirm your zero at the distance you’ll actually hunt or train, and recheck after transport or temperature changes. That discipline supports reliable hits and sound thermal scope ethics, since you owe the target a precise, humane shot.
How Thermal Scope Features Affect Bore Sighting
Thermal scope features directly affect how easily you can bore sight and how close you can get before live-fire zeroing. You’ll use the bore scope and thermal imaging display differently depending on magnification, reticle style, and image contrast.
- Base magnification: Lower power gives you a wider field for rough alignment.
- Reticle options: A simple, high-contrast reticle lets you center faster.
- Image refresh rate: Faster refresh reduces lag while you adjust aim.
- Focus and polarity settings: Sharp detail and consistent heat contrast make target center easier to judge.
Digital zoom can help, but it also narrows your view. Because thermal sensors show heat, not visible light, you should align on a stable heat source and confirm consistency before moving to live fire.
Common Thermal Bore Sighting Mistakes
One of the most common bore sighting mistakes is trusting the thermal image alone instead of checking mechanical alignment first. You should verify rail fit, ring torque, and reticle focus before you adjust anything.
Don’t chase bore sighting myths that claim every thermal optic behaves the same; sensor lag, display contrast, and parallax can distort your reference. Use the thermal scope benefits, such as clear target contrast and fast setup, but don’t let them replace disciplined setup.
| Mistake | Effect | Fix |
|---|---|---|
| Loose mount | Shifts point of aim | Torque properly |
| Blurry reticle | Bad alignment | Refocus ocular |
| Overadjusting | Erratic corrections | Make small moves |
You’ll get better results when you confirm level mounting, stable support, and consistent eye position.
Zeroing a Thermal Scope at the Range
Set up your rifle on a stable rest and confirm your thermal scope is mounted tight, then use a high-contrast target with a known aiming point.
Start at a measured distance, typically 50 or 100 yards, so you can verify impact position before adjusting. Fire a controlled group, then fine-tune windage and elevation until your point of impact matches your point of aim.
Range Setup
Before you fire a single round, you need to establish a stable setup that lets the thermal scope and rifle work from a known baseline. Secure the rifle in a solid rest, level the action, and check that mounts are torqued correctly.
Remove bore sighting myths and thermal scope myths from your planning; don’t mix in unrelated topics like ammo brands or reticle color. Instead, verify battery charge, lens focus, and display brightness before you begin.
- Keep the rifle unloaded and pointed safely.
- Eliminate movement with front and rear support.
- Confirm the scope is mounted straight.
- Use the same shooting position you’ll hold during zeroing.
A controlled setup reduces variables, so every click you make reflects the optic, not the bench.
Target Distance
Now choose a target distance that matches how you plan to use the thermal scope, because zero range affects both point of impact and holdover. If you hunt inside 100 yards, a 50-yard zero can keep trajectories manageable.
For mixed-distance shooting, 100 yards often gives a practical balance. You should confirm the range with the ammunition you’ll actually use, since velocity changes impact shift. Don’t trust bore sighting myths that suggest you can skip live-fire confirmation; thermal sensors still need real zeroing.
Use a clearly visible thermal target and a stable rest, then record the distance and settings. Keeping the scope zeroed efficiently also supports thermal scope longevity by reducing unnecessary adjustment cycles and repeated handling.
Fine-Tuning Zero
At the range, you should fine-tune zero by firing a small group, checking the impact point against your aim point, and making deliberate, measured adjustments to the thermal scope turrets or digital zero offsets. Keep the rifle supported, confirm focus, and watch for consistent hits before changing anything.
- Fire three to five rounds.
- Measure horizontal and vertical error.
- Dial corrections in small increments.
- Repeat until the group centers.
Don’t trust bore sighting myths that promise a perfect zero without live fire; they only get you close. Verify thermal reticle calibration after each adjustment, because image shift or menu changes can move the point of impact.
When the group tightens at your chosen distance, lock the settings and record them for later confirmation.
Frequently Asked Questions
Can Bore Sighting Damage a Thermal Scope?
Yes, bore sighting can damage your thermal scope if you expose it to recoil, impact, or improper alignment. You should follow thermal scope safety, because bore sighting risks include sensor stress, housing damage, and calibration errors.
Do Different Calibers Change Thermal Bore Sighting?
Yes, different calibers can change thermal bore sighting if barrel, velocity, or point-of-impact varies, so you should verify caliber consistency and mounting alignment.
You’ll need to recheck zero whenever ammunition or rifle platform changes.
Does Ambient Temperature Affect Thermal Bore Sighting?
Yes, ambient temperature can affect thermal bore sighting, like heat shimmering above pavement. You’ll see thermal drift shift your point of aim as temperatures change.
Can You Bore Sight Without Removing the Scope?
Yes, you can often bore sight without removing the scope. Use non-scope methods like laser inserts or a bore guide, but follow bore sighting cautions.
Verify zero at the range.
How Often Should a Thermal Scope Be Re-Bore Sighted?
You should re-bore sight your thermal scope whenever you change mounts, drop the rifle, or notice impact shift.
For maintenance cadence, check calibration methods before each season and after hard use, then confirm zero regularly.
Conclusion
Yes, you can bore sight your thermal rifle scope, and it’ll get you close fast, but it won’t replace a live-fire zero. For example, if you’re preparing for a hog hunt at dawn, a quick bore sight can save time and ammunition.
Mount the scope securely and align it with a heat source. Then, fine-tune your settings at the range for accuracy. A 100-yard confirmation still matters to ensure precision.
By combining bore sighting with live-fire adjustments, you’ll reduce wasted shots and start with real confidence. This approach is essential when you bore sight a thermal rifle scope.