The best spotting scope magnification isn’t simply the highest one you can buy. You’ll usually get better results by matching power to distance, light, and air stability.
Choose the lowest setting that still shows the detail you need. Start near 20x to 30x for fast target acquisition, move into 30x to 40x for balanced detail, and only push higher when conditions can support it.
Remember, the tradeoffs with higher magnification aren’t always obvious. Selecting the right magnification for your spotting scope ensures optimal performance in varied conditions.
Key Takeaways
- The best magnification is usually the lowest power that clearly shows the detail you need.
- For most users, 20x to 40x is the most practical spotting scope range.
- Mid-range zoom, around 30x to 40x, often gives the best balance of detail, brightness, and field of view.
- Higher magnification, such as 40x to 60x, can reveal more detail but needs very steady support and calm conditions.
- Lower power is better for scanning, faster target acquisition, and brighter, wider views.
What Is Spotting Scope Magnification?

Spotting scope magnification is the factor that enlarges the image of a distant target, letting you see fine detail more clearly. In spotting scope basics, you usually read it as a number, such as 20x or 60x, which means the image appears 20 or 60 times closer than with unaided vision.
Spotting scope magnification enlarges distant targets, bringing fine detail into clearer view at 20x, 60x, or beyond.
This setting doesn’t change the target; it changes how large the image looks through the optics. Understanding magnification mechanics helps you relate image size, field of view, and image stability.
As magnification rises, you gain detail but lose width of view and may notice more shake or dimmer images if the optics and lighting aren’t adequate. You should treat magnification as one part of the full optical system, working with objective lens size, eyepiece design, and focus accuracy.
Used correctly, it gives you a sharper, more usable view of distant subjects.
Best Magnification by Activity
The best spotting scope magnification depends on what you’re viewing and how far away it is. For a birding activity, you’ll usually get the best detail with 20x to 40x, which lets you identify plumage, bill shape, and behavior without excessive image shake.
If you’re scanning distant waterfowl or raptors, 30x to 60x can help, provided the atmosphere is steady. For a shooting scenario, 25x to 50x often works well for checking bullet impacts, reading targets, and spotting mirage at typical range distances.
You can use lower power for faster target acquisition and wider field of view, then increase magnification when you need finer resolution. In open terrain, longer distances justify higher power; in close-range observation, lower magnification usually performs better.
Your ideal setting should match target size, distance, and stability, not just the highest number on the barrel.
Why Mid-Range Zoom Is Often the Sweet Spot
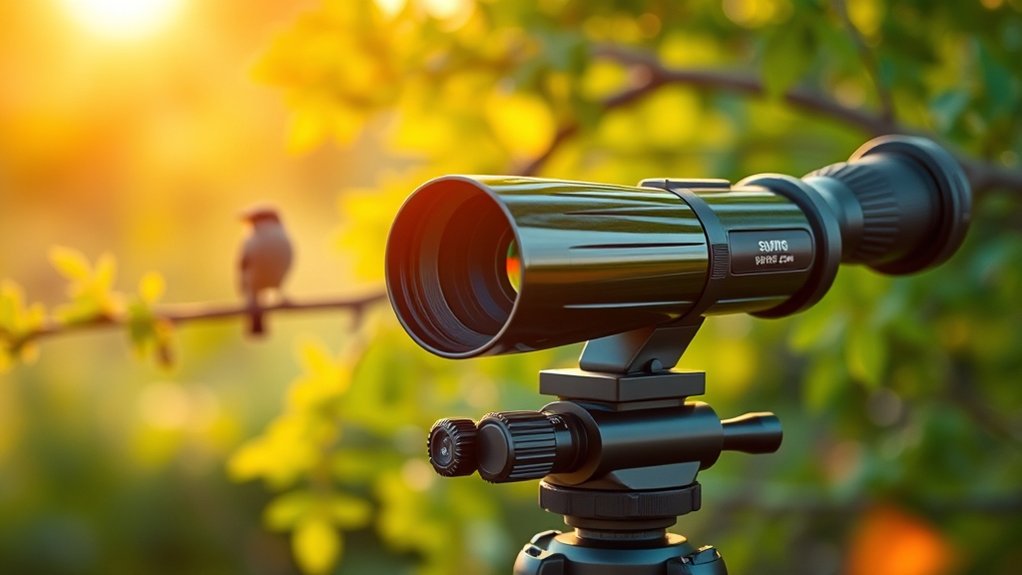
Mid-range zoom often gives you the best balance of detail, brightness, and field of view because it doesn’t push the scope to its optical limits. You get a practical range for glassing targets, reading signs, or spotting impacts without constant adjustment.
| Zoom range | Why it works |
|---|---|
| 20x–30x | Fast acquisition and steady viewing |
| 30x–40x | Broad utility for most users |
| 40x–50x | More reach without excessive compromise |
| Mid-range | Best overall versatility |
This range also improves spotting scope ergonomics: you spend less time fighting a narrow view and more time tracking what matters. For many users, it’s the sweet spot for budget tradeoffs too, since you can buy a capable optic without paying for extreme magnification you won’t use often.
If you want one setting that handles mixed field conditions, mid-range zoom usually delivers the most efficient, repeatable performance for your setup.
How Magnification Affects Image Quality
As you increase magnification, you often trade image clarity for a narrower field of view and more visible optical defects. Higher power also reduces light transmission, so the image can look dimmer and less contrast-rich, especially in low light.
To get useful detail, you need to balance magnification with stability, because even small vibrations can erase the resolution you’re trying to gain.
Clarity Versus Zoom
Higher magnification can make a target look larger, but it also exposes the limits of the scope’s optics, so image brightness, sharpness, and contrast usually drop as zoom increases. You’ll notice the clarity vs zoom tradeoff most when fine details soften, edges lose definition, and atmospheric distortion becomes easier to see.
At moderate power, you keep better resolution and more reliable focus, so the image often looks cleaner than it does at maximum zoom. Eye relief stability also matters, because small head movements can shift the view and reduce perceived sharpness.
For practical use, choose the lowest magnification that still lets you resolve the detail you need, then increase power only when the target remains steady enough to justify the loss in optical cleanliness.
Light Loss At Higher Power
Why does a spotting scope seem dimmer as you turn up the power? You spread the same collected light over a larger image, so exit pupil size drops and brightness falls. At higher magnification, you’ll also see reduced contrast if the optics and coatings don’t transmit efficiently.
This effect matters because image quality depends on usable light, not zoom alone.
- Higher power enlarges the image.
- Exit pupil shrinks, so less light reaches your eye.
- Fine detail can look less vivid in low light.
- Good optics reduce, but don’t eliminate, the loss.
This is a technical issue, not subtopic irrelevance or unrelated themes. In practice, you should match magnification to lighting conditions and avoid expecting maximum power to deliver the same visual brightness.
Stability And Detail Balance
How much magnification can you actually hold steady? That’s the key question because image quality drops when shake outpaces resolution. At lower power, you get a wider exit pupil, easier target acquisition, and a more forgiving stability balance.
As you raise magnification, you do gain apparent detail, but you also amplify vibration, atmospheric shimmer, and focus errors. The result is a sharper-looking subject only if your tripod, head, and viewing posture can control movement. Otherwise, the extra power just magnifies blur.
Your best choice depends on detail tradeoffs: use enough magnification to resolve the feature you need, but not so much that the image becomes unstable. In practice, a steady 20x often reveals more usable detail than a shaky 60x.
Field of View vs Magnification
As magnification increases, the spotting scope’s field of view narrows, so you’ll see a smaller portion of the scene at once. That tradeoff affects how fast you can locate subjects and how much context you retain.
In practical use, you should match magnification to your task and viewing distance, not chase the highest number. For birding ergonomics and telescope ergonomics, a wider field often reduces scanning effort and lets you track moving targets more efficiently.
- Low power: broad search area, easier subject acquisition.
- Mid power: balanced detail and context for general use.
- High power: finer resolution, reduced scene coverage.
- Very high power: useful only when the target stays fixed and visible.
You’ll usually work faster when the field of view supports quick target finding. Choose the lowest magnification that still gives the detail you need, and you’ll improve efficiency without sacrificing too much image context.
Why Eye Relief and Stability Matter

At higher magnification, you need enough eye relief to keep the full image visible without straining your eye or pressing too close to the eyepiece.
You’ll also notice that stability becomes critical because small vibrations get amplified and can blur fine detail. If you want a sharp, usable view, you have to balance eye relief with a steady support system.
Eye Relief Basics
Eye relief determines how far your eye should sit from the spotting scope’s eyepiece to see a full, usable image, and it becomes especially important as magnification increases. You need adequate eye relief to preserve eye comfort and maintain a clear field of view. Short eye relief can force you too close, making viewing harder for eyeglass wearers.
- Check the eyepiece specification in millimeters.
- Match it to your eyewear use.
- Verify the image stays full and bright.
- Test whether the viewing position feels natural.
A comfortable, repeatable eye position helps you evaluate detail faster and reduces unnecessary strain. When you compare scopes, eye relief should be a key specification, not an afterthought, because it directly affects how efficiently you observe at any power.
Stability At High Power
High magnification only helps when the image stays steady and your eye stays properly positioned. At 40x to 60x, even minor vibration, breathing, or wind can blur detail, so you need solid support and careful handling.
A rigid tripod, fluid head, and low-touch focusing reduce image shake, while proper eye relief keeps your pupil aligned and prevents blackouts. Good stability engineering lets the scope maintain optical performance without forcing you to brace the body hard.
Your zoom ergonomics also matter: if the eyepiece requires awkward hand movement, you’ll introduce more motion and lose target lock. Set the scope at a comfortable height, use a relaxed stance, and avoid extending the center column unless necessary for maximum steadiness.
How to Choose the Right Zoom Range
When you choose a spotting scope zoom range, focus on how you’ll actually use it rather than chasing the largest number. A practical range balances detail, field of view, and image brightness, and it should match your observing distance and expected targets. For most users, 20–60x gives enough flexibility without making the scope hard to control.
- Choose lower starts for easier target acquisition.
- Choose higher tops only if your tripod stability can support them.
- Check whether the zoom ring feels smooth with your birding ergonomics.
- Favor ranges that stay sharp near the upper end.
A narrower, well-corrected zoom often outperforms a wide, soft one. If you need to scan broad areas, prioritize the lower half of the range; if you need inspection, prioritize optical quality over extreme power. Test the scope on your tripod before buying, because the right zoom range only works when the setup remains steady and comfortable.
Best Magnification Tips for Birding and Shooting
For birding and shooting, the best magnification is usually the lowest power that still lets you identify details clearly, since that gives you a brighter image, a wider field of view, and a steadier view through atmospheric heat shimmer. You should start at 20x to 30x for general birding, then increase power only when plumage marks, leg color, or ring numbers demand it.
In shooting optics, use enough magnification to resolve the target and impact zone without narrowing your field too much or exaggerating mirage. Check your support: a tripod with a smooth head lets you hold finer detail at higher power, while poor support makes any image look shaky.
Birding ergonomics also matter, because you’ll track moving subjects more efficiently when eye placement, focus speed, and balance feel natural. Test your scope in real conditions, then choose the setting that gives the clearest usable detail, not the biggest number.
Frequently Asked Questions
Can I Use a Spotting Scope With My Smartphone?
Yes, you can use a spotting scope with your smartphone using smartphone integration adapters. You’ll capture images or video for memory capture, while maintaining alignment and focus through the scope’s eyepiece and your phone’s camera.
Are Fixed-Power Spotting Scopes Better Than Zoom Models?
You’ll often find fixed-power spotting scopes deliver better optical quality than zoom models because they simplify lens design and maximize brightness.
Fixed power vs zoom depends on your priority: sharpness, contrast, or flexible magnification.
Do Higher Magnifications Require a Heavier Tripod?
Yes, higher magnifications usually demand a heavier tripod; they’re like a magnifying glass on a tightrope. Your spotting scope needs tripod stability, magnification balance, and weight considerations to resist vibration and maintain sharp detail.
Can Weather Conditions Affect Spotting Scope Performance?
Yes, weather effects can reduce your spotting scope’s optical clarity. You’ll see heat shimmer, haze, rain, and wind degrade detail, contrast, and steadiness.
Use lower magnification, lens coatings, and shelter to preserve performance.
How Much Does Objective Lens Size Influence Magnification?
Bigger isn’t always better: your objective lens mainly affects brightness and resolution, not magnification itself.
You’ll notice clearer images at higher magnification, but you’ll face magnification tradeoffs, especially in low light and handheld use.
Conclusion
In the end, you’ll get the best spotting scope magnification by choosing the lowest power that still shows the detail you need. Start around 20x–30x for fast, bright viewing, shift to 30x–40x for everyday detail, and only push to 40x–50x when the air is steady and the distance is truly worth it.
You’ll see more, lose less brightness, and avoid a shaky, blurry, almost unusable image. Stability and eye relief matter just as much as zoom.
For optimal results, always aim for the best spotting scope magnification that balances clarity, brightness, and stability.