A properly zeroed scoped rifle can shrink group size dramatically, but only if you set it up and shoot it the same way every time. Shooting a scoped rifle effectively requires attention to detail and consistency in your approach.
You need solid mounts, correct eye relief, a firm cheek weld, and a stable position before you break the shot. Control your breathing, press the trigger straight back, and follow through.
Then see why small errors in setup can throw rounds off target. Consistency in these steps ensures accuracy and precision with your scoped rifle.
Key Takeaways
- Mount the scope securely, set eye relief, and level the reticle before shooting.
- Zero the rifle with consistent ammunition using a stable rest and small sight corrections.
- Build a stable shooting position with a firm cheek weld and body alignment behind the rifle.
- Focus the scope, confirm your natural point of aim, and pause at a natural breathing break.
- Press the trigger smoothly and follow through by keeping your head on the stock after the shot.
Essential Gear for a Scoped Rifle

Before you fire a scoped rifle, make sure you have the right gear to support accuracy and safety. You need a stable rifle, a correctly mounted scope, and rings that match the tube diameter. Use a torque driver to tighten screws to spec, and inspect mounts for movement before each session.
Wear eye and ear protection, and keep a rear support or shooting bag ready to steady the rifle. Choose ammunition that matches the rifle’s chambering, then organize ammo storage in a dry, locked container.
Check your sling, bipod, and cleaning kit for damage. Keep lens caps on until you’re ready to shoot, and avoid dragging the rifle over rough surfaces that leave scuff marks on the stock or optic.
Set Up Your Scope for a Clear Sight Picture
Set your eye relief so you can see a full sight picture without straining or risking scope contact. Adjust the diopter until the reticle appears sharp to your eye, then level the crosshairs with the rifle held in a stable firing position.
A properly set scope gives you a clear, consistent image and helps you place each shot with precision.
Adjust Eye Relief
Where should your eye sit behind the scope? Position the rifle so you get full image without shadowing or scope bite. Slide the scope forward or rearward until you see a complete field of view at your normal shooting position.
Maintain consistent eye relief by mounting the rifle with the same cheek weld each time; your head must land in the same place on the stock. Check that the sight picture stays clear when you shoulder the rifle firmly, not when you stretch your neck.
If you must move your head to see the edge, adjust the scope again. Tighten the rings after confirming the distance. Recheck from prone, seated, and standing positions, because stock pressure and body angle can change the result.
Set Diopter Focus
How sharp does the reticle look when you first shoulder the rifle? Set the diopter so the reticle appears crisp the instant you mount the scope. Point the rifle at a blank, light background, then rotate the ocular ring until the image snaps into focus. Don’t stare; look away between checks to protect diopter precision.
| Step | Action | Result |
|---|---|---|
| 1 | Aim at blank sky or wall | Removes target distraction |
| 2 | Turn ocular ring | Sharpens reticle |
| 3 | Recheck after a pause | Confirms focus |
After that, confirm the sight picture at your normal cheek weld. If the reticle still looks blurred, repeat the setting before you touch parallax adjustment. A correctly set diopter lets you evaluate the target plane cleanly and shoot with less strain.
Level Crosshairs
With the diopter set, make sure the reticle’s vertical and horizontal lines are level before you trust your sight picture. Mount the rifle securely, then rotate the scope until the crosshairs align with a plumb line or a known horizontal edge.
Don’t rely on the rifle’s stock alone; you need true scope alignment, not just a comfortable head position. Make small level adjustments, then recheck after tightening the rings to prevent cant from shifting point of impact.
If you’re on uneven ground, use a bubble level or leveling kit to confirm consistency. A level reticle improves elevation and wind holds, and it supports recoil management by keeping your position square and predictable.
Verify the setup again before live fire, because a few minutes here saves misses later.
Get Proper Eye Relief and Cheek Weld
Set your scope so you see a full, clear sight picture when you mount the rifle, then adjust eye relief until the image stays sharp without any shadowing around the edges. Slide the scope forward or back until you can maintain that picture with your normal shooting posture.
Keep enough eye relief to prevent scope bite under recoil, but don’t stretch so far that you lose a consistent view. Next, build a firm cheek weld by placing the same part of your face on the stock every time.
Your eye should align naturally with the optic, not by forcing your head down or forward. When eye relief and cheek weld match, you’ll center the reticle faster and keep your sight picture repeatable shot after shot.
Use a Stable Shooting Position
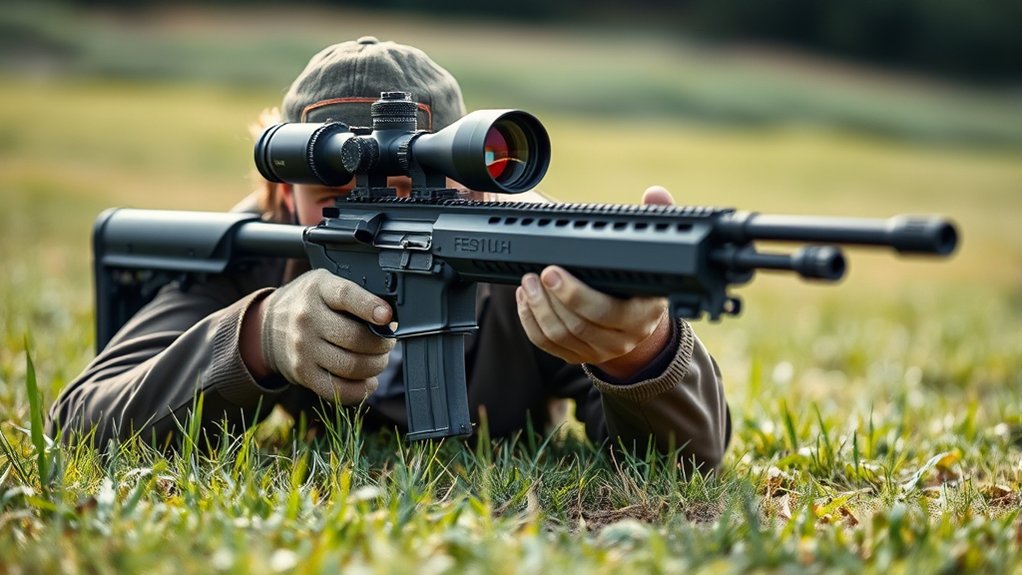
A stable shooting position starts with a balanced body and a rifle that settles naturally on target. Plant your feet shoulder-width apart, shift your weight slightly forward, and lock your elbows or support arm to create a rigid platform.
Keep the rifle’s butt seated firmly in your shoulder pocket so recoil management stays consistent shot to shot. If you’re prone, use a bipod or firm rest and keep your body aligned behind the bore.
If you’re seated or kneeling, build contact points that don’t shift under pressure. Relax your grip enough to avoid muscle tension, but maintain control. A stable position also reduces movement from wind effects, because less body sway means less disturbance.
Check your position before each shot and correct any wobble immediately.
Aim With Crosshairs and Target Focus
Align the crosshairs so the reticle intersects your point of aim without canting the rifle or shifting your cheek weld. Keep your focus on the target, not the scope, so you can confirm sight alignment and hold the correct aim point.
Control your breathing by pausing at the natural respiratory break, then press the trigger without disturbing the sight picture.
Crosshair Alignment
Why does crosshair alignment matter so much? Because you must center the reticle consistently to maintain repeatable impact. Keep your cheek weld firm, then adjust the rifle so the crosshair sits level and true on the target center.
If the scope shows drift, check mounting tension and confirm scope durability before firing again. Use this quick reference:
| Check | Action |
|---|---|
| Level reticle | Rotate the rifle until vertical stadia is plumb |
| Center crosshair | Align the intersection on the intended point |
| Control crosshair parallax | Move your head slightly; the reticle shouldn’t shift |
| Confirm stability | Verify rings, base, and scope durability |
Apply pressure straight to the trigger and keep alignment unchanged through the shot.
Target Focus
With the crosshair centered and level, shift your attention to the target without letting the reticle drift off the intended point. You should hold the rifle steady and let your eye register the sight picture as a single image.
Keep the target sharp enough to verify point of aim, and use the reticle as the reference for exact placement. Avoid staring so hard that you ignore small movement in the optic. Instead, maintain a disciplined visual lock that lets you detect wind deflection and any shift in alignment.
If the scope has variable power, choose a magnification that supports precise target focus without narrowing awareness. Stay consistent from shot to shot, and correct parallax only if needed so the crosshairs stay true on the target.
Breathing Control
Control your breathing so the rifle stays still while your crosshairs remain on target. Take a normal breath, let it out halfway, and pause briefly at the natural respiratory pause before pressing the shot.
You should keep your breathing rhythm deliberate and repeatable, because irregular inhalation shifts the rifle and your sight picture. Use breath control to settle your chest, shoulders, and trigger hand before you begin the final squeeze.
Don’t hold your breath too long; if the pause feels strained, abort the shot, breathe normally, and reset your position. Watch the reticle during each pause, and press the trigger only when the crosshairs stay centered.
Consistent breathing reduces movement, improves steadiness, and helps you break the shot cleanly with precision.
Control Your Breathing and Trigger Pull
Take a steady breath, then let half of it out and pause at the natural respiratory break before you press the trigger.
Keep your breathing rhythm consistent so the rifle stays stable and your sight picture doesn’t drift. Maintain firm trigger discipline: place the pad of your index finger on the trigger, then increase pressure straight to the rear without disturbing the rifle.
| Control point | Action |
|---|---|
| Breath | Inhale normally |
| Exhale | Release half |
| Pause | Use the break |
| Finger | Press straight back |
| Sight | Hold alignment |
You should isolate the trigger press from the breath cycle, not hurry it. If the reticle moves, reset your breathing rhythm and begin again. Apply smooth, deliberate pressure until the shot breaks cleanly. Avoid jerking, snatching, or staging the trigger in a way that shifts the rifle.
Follow Through After the Shot
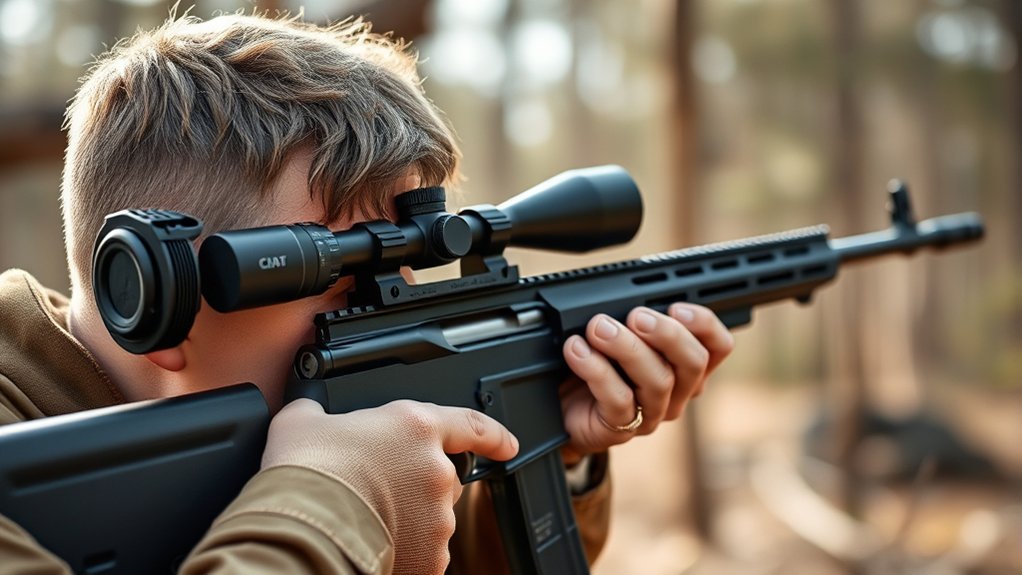
After the shot breaks, keep the rifle shouldered and your head on the stock until the bullet impacts; don’t lift off the scope or relax your grip too soon. Hold your sight picture and let recoil complete before you move.
Watch the reticle settle back on target, then note any impact reference you can confirm from the firing position. This discipline helps you diagnose flinching, inconsistent grip, or follow-through errors.
Keep your firing hand firm and your support hand steady until the rifle stops moving. If needed, record conditions for later windage adjustments, but don’t chase them immediately.
After you clear the rifle, inspect the optic, mount, and lenses as part of routine scope maintenance. Consistent follow-through preserves shot consistency and gives you cleaner feedback.
Zero Your Rifle for Accuracy
A properly zeroed rifle puts your point of aim and point of impact in the same place at a known distance, so begin by confirming your optic is mounted securely and your ammunition is consistent.
Set a target at your chosen zero distance, then fire a careful three-shot group from a stable rest. Measure the group center, not individual holes, and adjust elevation and windage in the direction your reticle must move.
Make small corrections, then confirm with another group. Repeat until impact matches aim. Use scope safety by keeping the rifle pointed downrange and the action open while you adjust.
Record the final settings and ammunition type in your maintenance routine so you can reproduce the zero later.
Fix Common Scoped Rifle Shooting Mistakes
Even a well-zeroed rifle can miss if your technique is inconsistent, so now focus on the errors that most often throw shots off target. Check scope mounting first; loose rings, poor eye relief, or a canted optic shift impact point and distort your hold.
Even a well-zeroed rifle can miss if your technique is inconsistent; check scope mounting first.
Build a stable position, then control trigger press so you don’t jerk the rifle as the sear breaks. Verify your follow-through; lifting your head early changes recoil tracking and hides shot errors.
Keep your cheek weld identical on every shot.
Align the reticle level to avoid cant-induced horizontal error.
Read wind drift and hold correctly instead of guessing.
Confirm breathing, natural point of aim, and parallax settings before you fire. Diagnose one variable at a time, and your groups will tighten quickly.
Frequently Asked Questions
What Magnification Is Best for Different Shooting Distances?
For short range, you’ll want low magnification; for mid range, use moderate magnification; for long range, choose higher power.
Your magnification considerations should match distance estimation, target size, and sight picture stability.
How Do I Choose the Right Rifle Scope Reticle?
Choose a reticle that matches your shooting distance and speed needs; 68% of shooters prefer simple crosshairs for precision. You should prioritize reticle selection, then confirm eye relief, and practice under recoil before buying.
What Maintenance Does a Scoped Rifle Need?
You’ll need regular lens cleaning, mount screw checks, bore inspection, and a maintenance checklist. Reconfirm zero after impacts or weather changes, and follow zeroing procedures periodically to ensure your scoped rifle stays accurate.
How Can I Transport a Scoped Rifle Safely?
You can transport a scoped rifle safely by unloading it, removing the magazine, and locking the action open. Use a padded case and secure it in your vehicle.
Check legal considerations before crossing borders or jurisdictions.
What Weather Conditions Affect Scoped Rifle Performance?
Weather changes can shift your scope’s performance. You’ll notice foggy mornings reduce visibility, while wind direction alters point of impact.
Don’t assume only rain matters; temperature swings and mirage can also distort aiming and zero.
Conclusion
In the calm before the shot, you secure your rifle, set your scope, and settle into a solid position. One careful breath, one smooth trigger press, and the crack of the rifle replaces hesitation.
That contrast—stillness and recoil, focus and impact—defines accurate shooting. When you keep your cheek weld consistent, your crosshairs level, and your follow-through disciplined, you don’t just fire a scoped rifle; you repeat a precise process that puts rounds where you want them.
Mastering these steps is essential for every shooter who wants to excel. Ultimately, understanding how to shoot a scoped rifle ensures that each shot is both intentional and effective.