To assemble your AR-15 lower, first gather all necessary tools and parts, ensuring compatibility. Proper preparation is key to a smooth assembly process.
Start by installing the magazine catch and release button, then fit the bolt catch assembly. Insert the trigger group and safety selector, securing them with pins.
Next, attach the buffer tube with spring and buffer, followed by mounting the stock or brace.
Always perform a function check to confirm proper operation and avoid common errors.
Mastering these steps will prepare you for more advanced assembly procedures.
Key Takeaways
- Gather all required tools and compatible lower receiver parts before starting assembly in a clean, well-lit workspace.
- Install the magazine catch, compress the spring, and thread the release button without cross-threading for smooth magazine release.
- Assemble the trigger group, hammer, safety selector, and pistol grip, securing each with proper pins and springs to ensure function.
- Attach the buffer tube with buffer spring and buffer, applying grease and torqueing per specifications, then mount the stock or brace.
- Perform a thorough function check by cocking the hammer, engaging the safety, and pulling the trigger to verify safe and reliable operation.
Gather Tools and Parts for Your AR-15 Lower
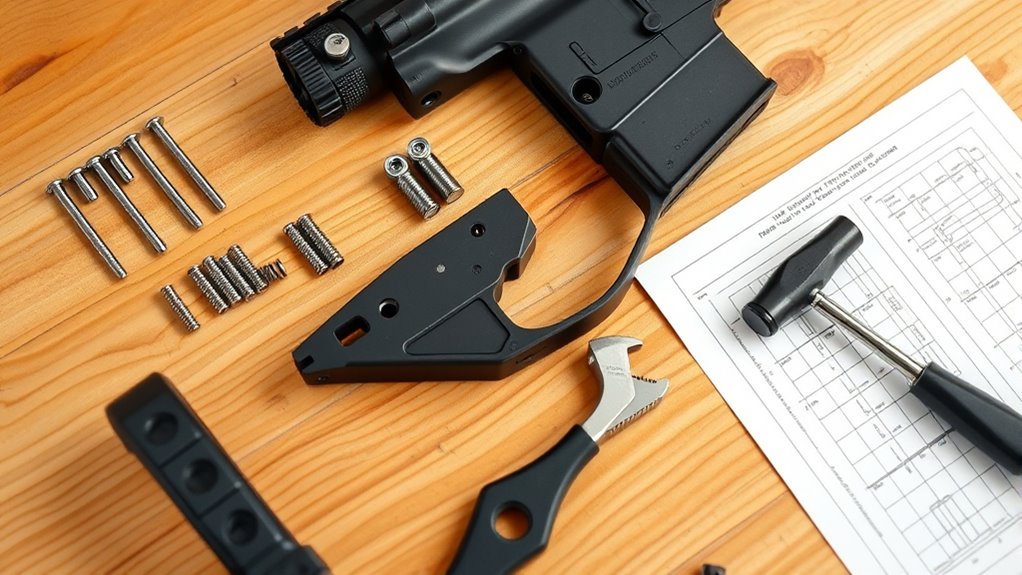
Before you begin assembling your AR-15 lower, you’ll need to gather all the necessary tools and parts to guarantee a smooth and efficient build process. Start by ensuring your tool organization is meticulous: arrange punches, hex wrenches, screwdrivers, and a small hammer within easy reach. Essential parts include the lower receiver, trigger assembly, hammer, magazine catch, bolt catch, and selector components.
Also, don’t forget small pins and springs critical for proper function. Verify each component’s compatibility with your lower receiver model to prevent assembly issues. Having a clean, well-lit workspace enhances precision and reduces errors.
Proper tool organization not only saves time but also minimizes the risk of losing tiny parts during assembly, ensuring your build proceeds without interruption. This preparation sets the foundation for a successful AR-15 lower assembly.
Learn the Key Components of the Lower Receiver
You need to identify the essential parts of the lower receiver, including the trigger group, magazine catch, bolt catch, and safety selector. Each component plays a specific role in the firearm’s operation, from firing to magazine retention and safety control.
Understanding their functions guarantees accurate assembly and reliable performance.
Lower Receiver Parts
Seven essential parts make up the AR-15 lower receiver, each playing a significant role in the firearm’s function and reliability. When working on your lower receiver assembly, understanding parts compatibility is essential to guarantee smooth operation.
Key components include:
- Trigger group: Comprises the trigger, hammer, and associated springs, important for firing control.
- Magazine catch assembly: Holds the magazine securely and allows for quick release.
- Bolt catch assembly: Engages the bolt to lock it open after the last round is fired.
Each part must fit precisely within the lower receiver to maintain proper alignment and function. Selecting components from reputable manufacturers assures parts compatibility, reducing the risk of malfunctions during operation.
Mastering these parts forms the foundation before moving to detailed functional assembly.
Function of Key Components
Understanding the function of each key component within the AR-15 lower receiver is critical for proper assembly and operation. Knowing key component functions guarantees you correctly install parts like the trigger group, safety selector, and magazine catch, which directly impact firearm performance and safety.
Here’s a concise overview to guide your essential assembly tips:
| Component | Function | Assembly Tip |
|---|---|---|
| Trigger Group | Initiates firing sequence | Align carefully with pins |
| Safety Selector | Enables safe/fire modes | Guarantee smooth rotation |
| Magazine Catch | Secures magazine | Check spring tension |
| Buffer Tube | Absorbs recoil, houses spring | Tighten firmly without overtorque |
Mastering these functions streamlines assembly and guarantees reliable AR-15 operation.
Install the Magazine Catch and Release Button

Now, you’ll focus on installing the magazine catch and its release button, vital components for securing your magazine in place.
You’ll start by assembling the magazine catch components, including the catch, spring, and button. Precise alignment and correct spring tension are critical during these installation steps to guarantee reliable magazine retention and release.
Magazine Catch Components
The magazine catch components play an essential role in securing the magazine within the AR-15 lower receiver. These parts guarantee the magazine stays firmly in place during operation and can be quickly released when needed. The two main elements you’ll work with are the magazine catch itself and the catch release button.
Together, they form a locking mechanism that engages and disengages the magazine.
Key components include:
- Magazine catch: A threaded rod that locks the magazine in place.
- Catch release button: The part you press to release the magazine.
- Magazine catch spring: Provides tension, guaranteeing secure engagement and smooth catch release action.
Understanding these parts helps you correctly install and troubleshoot the magazine catch system for reliable firearm function.
Button Installation Steps
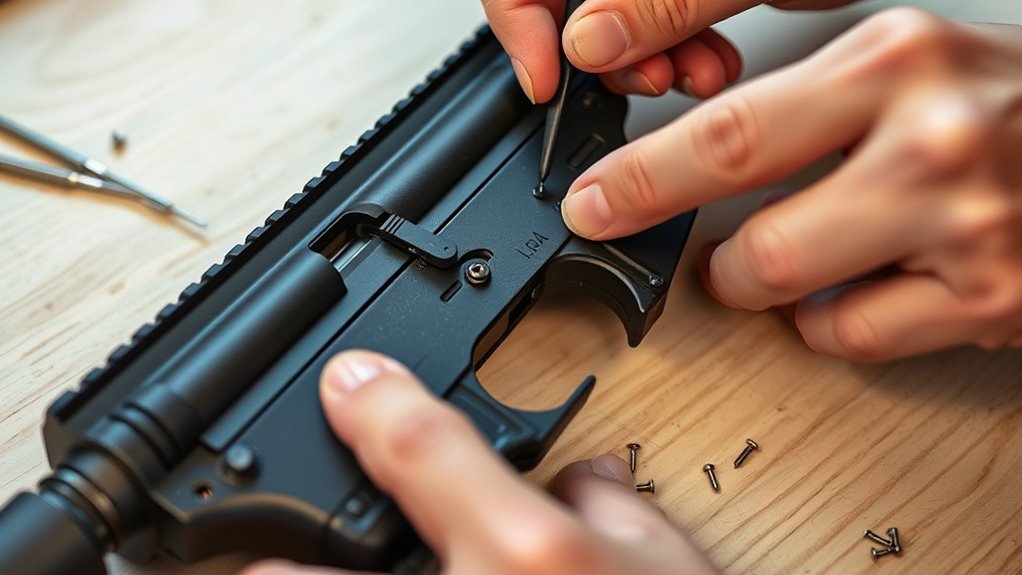
Before installing the magazine catch and release button, make certain you have all components ready and the lower receiver properly secured. Begin by selecting the appropriate button type, as variations exist between standard and enhanced models. Insert the magazine catch through the receiver’s left side, compressing the spring as you position the button on the right side.
Carefully thread the button onto the catch, ensuring proper alignment without cross-threading. Use installation tips such as applying slight pressure to maintain tension on the spring, preventing it from slipping out during assembly. Tighten the button firmly but avoid over-torquing, which can damage threads or impair function.
Finally, verify smooth operation by pressing the button; it should release the magazine catch cleanly without binding or excessive resistance.
Install the Bolt Catch Assembly
Begin by aligning the bolt catch into its designated slot on the lower receiver, guaranteeing the spring and plunger are correctly positioned to provide proper tension. Carefully compress the spring and plunger into their recess, then insert the roll pin through the bolt catch and receiver holes.
Use a roll pin punch and hammer to gently tap the pin until it’s flush, avoiding damage to the receiver or bolt catch. Here are some assembly tips to guarantee a smooth installation:
- Keep the spring and plunger under slight compression to prevent them from popping out.
- Use a properly sized roll pin punch to maintain alignment and avoid deformation.
- Work slowly, checking alignment frequently to prevent pin binding or misplacement.
This precise approach guarantees reliable bolt catch function and longevity.
Install the Trigger Group and Safety Selector
Install the trigger group and safety selector by carefully positioning each component into the lower receiver’s corresponding cavities, ensuring the trigger, hammer, and safety parts align precisely with their pin holes. Begin with the trigger installation: insert the trigger and trigger spring, followed by the trigger pin to secure the assembly.
Next, place the hammer and hammer spring into their designated slots, confirming the hammer spring is correctly oriented for proper tension. Secure the hammer with its pin, verifying smooth movement.
For the safety selector, insert it into the receiver’s selector hole from the left side, engaging the detent spring and detent from the right side to lock it in place. Test the safety selector’s function to confirm it rotates freely between safe and fire positions before proceeding.
Attach the Pistol Grip to the Lower Receiver
Secure the pistol grip to the lower receiver by aligning its mounting hole with the threaded hole at the rear of the receiver. Before installation, select from various pistol grip types—standard, ergonomic, or storage-capable—based on your handling preference.
Insert the provided screw through the grip’s hole, ensuring it passes into the lower receiver’s threaded insert. Tighten the screw firmly but avoid overtightening to prevent stripping threads.
Carefully insert and tighten the grip screw into the receiver, avoiding overtightening to protect the threads.
Use grip installation tips such as applying a small amount of thread locker for vibration resistance and confirming the grip’s position is comfortable with the trigger finger resting naturally. Check that the safety selector detent spring is properly seated inside the grip area before final tightening.
- Choose pistol grip types that suit your ergonomics
- Align screw holes precisely to avoid cross-threading
- Use thread locker for secure attachment without damage
Install the Buffer Tube, Spring, and Buffer
With the pistol grip firmly attached and all detent springs properly seated, you can proceed to assemble the buffer system. Start buffer tube installation by aligning the buffer spring inside the tube, making sure spring alignment prevents binding.
Insert the buffer after the spring, pushing both gently into the lower receiver extension. Secure the buffer tube by threading it clockwise, engaging the castle nut if present. Confirm proper spring tension and smooth buffer movement within the tube.
| Step | Component | Key Action |
|---|---|---|
| 1 | Buffer Tube | Thread onto receiver |
| 2 | Buffer Spring | Insert, make sure alignment |
| 3 | Buffer | Insert after spring |
| 4 | Castle Nut (if any) | Tighten securely |
| 5 | Final Check | Verify smooth movement |
Mount the Stock or Brace on the Buffer Tube
Now that the buffer tube is installed, you’ll need to select a stock or brace compatible with your setup, considering factors like length of pull and intended use.
Make sure the stock or brace aligns properly with the buffer tube’s threads or attachment mechanism for a secure fit. Carefully thread or slide the component onto the buffer tube, confirming it locks firmly without play.
Choosing The Right Stock
Selecting the appropriate stock or brace for your AR-15 lower is essential for ensuring proper fitment and function. You’ll want to evaluate whether a fixed stock or adjustable stock best suits your needs, as each affects ergonomics and handling differently. Fixed stocks offer rigid stability and consistent length of pull, ideal for precision shooting.
Adjustable stocks, however, provide versatility by allowing length adjustments to accommodate various shooting positions or body sizes. When choosing, pay attention to compatibility with your buffer tube type (mil-spec or commercial), material and durability for intended use (polymer, aluminum), and additional features like storage compartments or sling attachment points.
Choosing the right stock enhances control, comfort, and overall firearm performance during assembly and use.
Attaching The Buffer Tube
Attaching the buffer tube is a critical step in assembling your AR-15 lower, as it serves as the mounting point for the stock or brace and houses the buffer and buffer spring. First, identify the correct buffer tube type—mil-spec or commercial—as they differ in diameter and threading.
Before installation, apply a small amount of grease to the buffer tube threads to ease threading and prevent galling. Insert the buffer retainer and spring into the lower receiver, then carefully thread the buffer tube, making sure it compresses the buffer retainer spring.
Torque the buffer tube firmly per manufacturer specifications to avoid loosening. Finally, attach your chosen stock or brace onto the buffer tube, confirming secure engagement. These installation tips help guarantee proper function and durability of your AR-15 lower assembly.
Perform a Function Check on Your AR-15 Lower
Begin by verifying your AR-15 lower is clear of any ammunition and that all components are properly installed. Performing a thorough function check is critical for safety verification and to confirm correct assembly. Follow these steps:
- Pull the charging handle to the rear; the hammer should cock and stay in position when released.
- Engage the safety selector; attempt to pull the trigger—there should be no movement.
- With the safety off, pull the trigger; the hammer should release smoothly and reset after releasing the trigger.
This precise function check confirms the lower’s firing mechanism operates correctly and that the safety selector effectively blocks trigger movement. Never skip this verification to guarantee reliable and safe firearm operation before proceeding.
Avoid Common Mistakes When Building Your AR-15 Lower
After confirming your AR-15 lower functions correctly through the function check, it’s important to recognize and avoid common mistakes that can compromise assembly quality and firearm reliability.
One frequent pitfall is improper torque on the castle nut, which can lead to loosening during firing. Use a torque wrench set to manufacturer specifications. Another major issue involves incorrect trigger pin installation; make certain pins fully seat without forcing to prevent damage.
Missing or misplacing detent springs often causes malfunction—double-check their placement during assembly. Avoid overtightening the buffer tube, as it can strip threads or deform the receiver. Finally, keep all parts clean and lubricated per assembly tips to enhance function and longevity.
Avoid these common pitfalls to make certain your AR-15 lower operates safely and reliably.
Frequently Asked Questions
What Caliber Options Are Compatible With the AR-15 Lower?
You’ll find caliber variations like .223 Remington, 5.56 NATO, and .300 Blackout compatible with your AR-15 lower.
However, compatibility factors such as bolt carrier group and magazine type must align precisely for safe, reliable function.
Can I Assemble an AR-15 Lower Without a Gunsmith License?
You can legally assemble an AR-15 lower without a gunsmith license, as 85% of hobbyists do. Just verify you follow all legal requirements and use proper assembly tools for precise, safe construction compliant with your jurisdiction’s laws.
Ensure you are familiar with federal, state, and local regulations before beginning the assembly process. Taking the time to educate yourself helps prevent legal issues and ensures the firearm is built safely. Using the correct tools and following step-by-step instructions is also critical for successful assembly.
How Do I Legally Register a Homemade AR-15 Lower?
You legally register a homemade AR-15 lower by complying with legal requirements, including contacting the ATF, submitting a Form 1 for a homemade registration, paying applicable fees, and following all federal and state firearm laws precisely.
Start by filling out the ATF Form 1 (Application to Make and Register a Firearm). This form is required to legally manufacture and register your own firearm.
Submit the completed Form 1 to the ATF along with the appropriate fee. Wait for the approval before proceeding with the build.
Make sure to follow all applicable federal, state, and local laws throughout the process to ensure your registration is valid and legal.
What Are the Best Cleaning Practices for an Assembled AR-15 Lower?
You don’t need to clean your AR-15 lower ever—if you want it to malfunction. Realistically, clean it after every 500-1000 rounds.
Focus on lubrication, inspecting pins, and removing debris; these maintenance tips guarantee reliability and longevity.
How Do I Troubleshoot Trigger Pull Issues After Assembly?
You’ll want to check sear alignment first, ensuring it’s precise and engages smoothly. Then, perform trigger adjustment carefully, fine-tuning pull weight and travel.
Any misalignment or improper adjustment can cause inconsistent or heavy trigger pull issues.
Conclusion
Now that you’ve methodically assembled your AR-15 lower, imagine each component—magazine catch, bolt catch, trigger group—working in flawless harmony like a finely tuned engine. Your precise installation guarantees reliability and safety, much like a clock’s gears meshing perfectly to keep time.
By avoiding common pitfalls and conducting a thorough function check, you’ve transformed individual parts into a cohesive, high-functioning system ready for seamless operation. This careful attention to detail ensures your firearm performs optimally.
In conclusion, mastering how to assemble an AR-15 lower not only builds a reliable platform but also deepens your understanding of this versatile rifle’s mechanics.