To cock your crossbow safely, first engage the safety and inspect the string and cables for any damage.
Using the right tools, such as a cocking rope or crank, depends on your strength and the type of crossbow you have.
Maintain a stable stance and ensure the string locks with a firm click, indicating it’s fully cocked.
Always point the crossbow in a safe direction and avoid forcing the string.
Following these basics guarantees safe, effective cocking.
Explore further to master techniques and avoid common errors.
Key Takeaways
- Inspect the crossbow string and cables for damage before cocking to ensure safety and functionality.
- Engage the safety mechanism to prevent accidental firing during the cocking process.
- Use a cocking rope or crank device for even string tension and reduced physical effort.
- Pull the string back steadily until it locks with a distinct click, confirming full cocking.
- Verify the string is securely seated in the trigger mechanism and the safety remains engaged before loading bolts.
What Tools and Safety Gear Do You Need Before Cocking a Crossbow
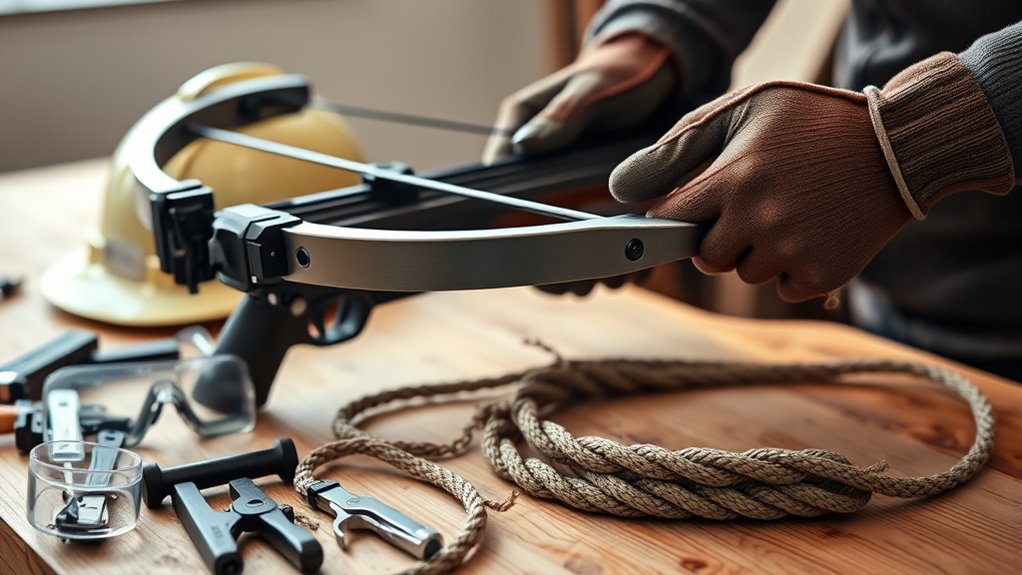
Before you cock a crossbow, you need a few essential tools and safety gear to secure the process is safe and efficient. Prioritize crossbow safety by wearing protective eyewear to shield your eyes from potential snapbacks or debris. Use sturdy gloves to protect your hands and improve grip.
Essential tools include a cocking rope or crank, designed to evenly draw the string back without causing strain or injury. Make sure your work area is clear and well-lit. Avoid distractions and never cock the crossbow near others.
Keep a quiver or bolt holder nearby to manage your projectiles safely. By assembling these essential tools and prioritizing crossbow safety, you’ll guarantee a smooth, controlled cocking process free from accidents and damage.
How to Check Your Crossbow’s String and Cables Before Cocking
Before you cock your crossbow, closely inspect the string for any signs of wear or damage. Make certain to examine the cable tension to guarantee it’s balanced and secure.
Don’t forget to check for fraying on both the string and cables, as any weakness can compromise safety and performance.
Inspect String For Wear
One essential step in preparing your crossbow is inspecting the string and cables for any signs of wear or damage. Proper string maintenance is critical to your safety and the crossbow’s performance. Focus on wear indicators like frays, broken strands, or discoloration.
Use good lighting and carefully examine the entire length of the string and cables.
| Wear Indicator | Description |
|---|---|
| Fraying | Loose or fuzzy fibers |
| Broken Strands | Visible snapped threads |
| Discoloration | Unusual fading or dark spots |
| Flattening | Areas where string looks compressed |
| Glazing | Shiny, hardened spots from slipping |
If you find any damage, replace the string immediately. Never attempt to cock a crossbow with compromised strings, as it risks failure and injury.
Examine Cable Tension
Cable tension plays an essential role in your crossbow’s accuracy and safety, so you need to verify it carefully before cocking. Proper cable maintenance guarantees consistent performance and prevents damage.
To examine cable tension effectively, follow these steps:
- Visually inspect cables for uniform tightness on both sides.
- Gently press the cables; they should feel taut but not overly stiff.
- Compare tension against manufacturer specifications or a tension gauge.
- If cables feel loose or uneven, perform tension adjustment promptly.
- Confirm cables are properly seated in their grooves without slack.
Regularly checking cable tension helps avoid misfires and extends the lifespan of your crossbow. Don’t skip this critical step before cocking to maintain safe, reliable operation.
Check For Fraying
Although regular tension checks are essential, you should also inspect your crossbow’s string and cables for fraying before cocking. Fraying inspection is a critical part of string maintenance that guarantees safety and peak performance. Look closely for worn, broken, or loose fibers, especially near the cams and limbs.
| Area | What to Check | Action if Fraying Found |
|---|---|---|
| String | Broken or loose strands | Replace string immediately |
| Cables | Frayed or worn sections | Tighten or replace cables |
| Limb Ends | Contact points for wear | Inspect for damage |
| Pulleys | Cable rubbing marks | Adjust or lubricate |
Perform this inspection every time before cocking to maintain reliable string integrity.
Prepping Your Crossbow Before Cocking
Before you start cocking your crossbow, make certain it’s properly prepared to verify safety and efficiency. Proper crossbow maintenance and storage play a key role in this preparation. Follow these essential steps:
- Inspect the string and cables for signs of wear or damage.
- Verify the safety mechanism is engaged before handling.
- Check that the limbs and riser are free of cracks or deformities.
- Confirm bolts are dry and free from dirt or debris.
- Store your crossbow in a dry, secure location to prevent moisture damage.
Different Ways to Cock Your Crossbow: And When to Use Them?
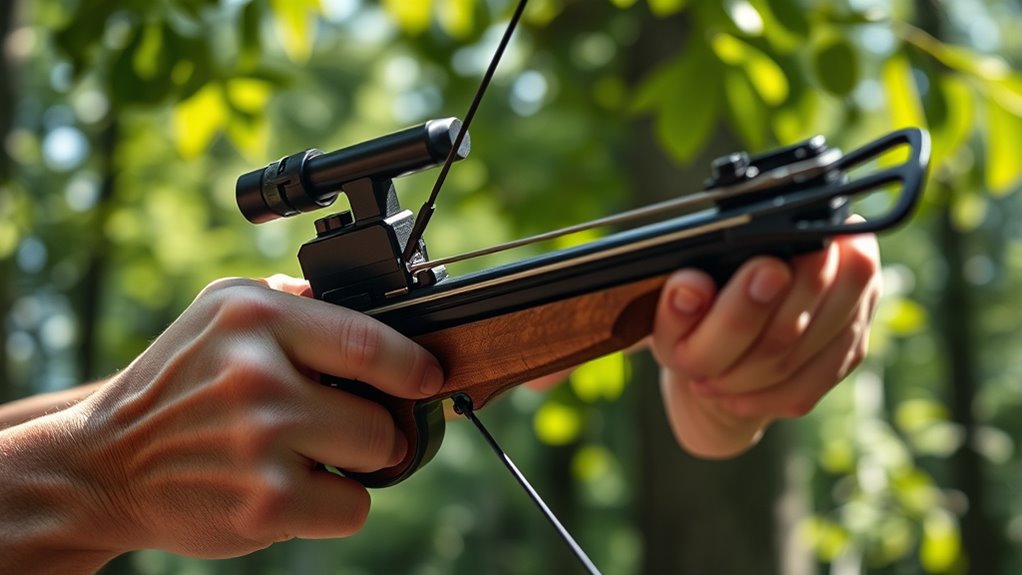
There are three primary methods to cock your crossbow: using your hands, a rope cocking aid, or a crank cocking device. Manual cocking with your hands is straightforward but requires strength and is best for lighter crossbows.
Rope cocking aids reduce effort and improve accuracy by ensuring even tension. Mechanical cocking via a crank device offers the easiest and most consistent method, ideal for heavier crossbows or frequent use.
| Method | Effort Level | Best For |
|---|---|---|
| Manual Cocking | High | Lightweight crossbows |
| Rope Cocking Aid | Medium | Moderate weight, precision |
| Crank Cocking Device | Low | Heavy crossbows, frequent use |
Choose the method fitting your strength and crossbow type to maximize safety and efficiency.
Step-by-Step Guide to Cocking Your Crossbow Safely
Before you start cocking your crossbow, make certain it’s properly prepared and positioned for safety. Follow precise techniques to evenly draw the string without forcing or twisting.
Taking these steps guarantees you cock your crossbow securely and reduce the risk of accidents.
Preparing Your Crossbow
Although cocking a crossbow might seem straightforward, taking deliberate steps guarantees both your safety and the weapon’s ideal performance. Proper preparation is critical before you begin cocking. Consistent crossbow maintenance guarantees the mechanism operates smoothly, reducing wear and preventing accidents.
Here’s how to prepare:
- Inspect the bowstring and limbs for damage or fraying.
- Confirm the safety is engaged to prevent accidental firing.
- Clear the area of distractions and guarantee a stable stance.
- Lubricate the rail and trigger mechanism as part of routine maintenance.
- Verify your cocking tools or aids are in good condition.
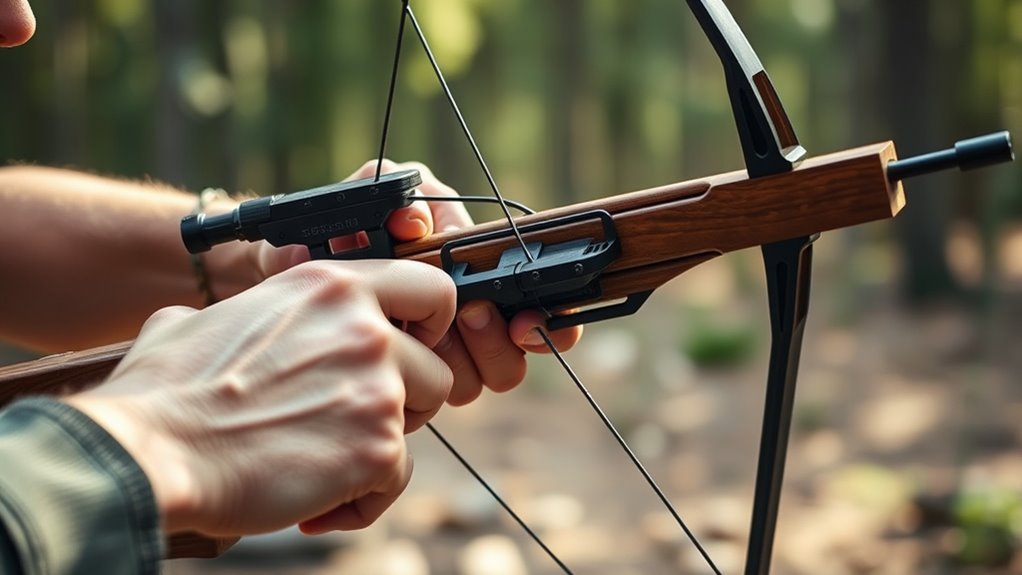
Safe Cocking Techniques
Once you’ve prepared your crossbow, you’ll need to follow a precise sequence to cock it safely and effectively. First, verify the crossbow is pointed in a safe direction, adhering strictly to crossbow safety rules. Use a cocking rope or device if available; it reduces the effort required and guarantees even tension on the limbs.
Securely place your foot on the stirrup, keeping your stance stable. Grasp the cocking mechanism firmly and pull it straight back until it locks into place; avoid twisting motions. Confirm the safety is engaged immediately after cocking.
Never dry-fire your crossbow. These cocking techniques minimize risk and prolong the life of your equipment. By following these steps, you uphold crossbow safety and maintain control throughout the process.
Tips for Proper Crossbow Form to Make Cocking Easier
To make cocking your crossbow easier, you need to focus on your stance and grip. Proper crossbow stance guarantees stability and maximizes your strength, while effective grip techniques reduce fatigue and improve control. Follow these tips for ideal form:
Focusing on stance and grip makes cocking your crossbow easier, boosting strength and control.
- Stand with feet shoulder-width apart for balanced support.
- Keep your back straight to engage core muscles effectively.
- Use a firm yet relaxed grip on the crossbow’s stock to prevent slipping.
- Position your dominant hand consistently for smooth cocking motion.
- Align your shoulders squarely with the crossbow to direct force efficiently.
Common Mistakes to Avoid When Cocking a Crossbow
Mastering proper form sets the foundation, but even with the right stance and grip, there are common mistakes that can compromise your safety and effectiveness when cocking a crossbow. One frequent error is neglecting crossbow safety by not ensuring the weapon is pointed in a safe direction during cocking.
Avoid rushing the process—forcing the string can cause injury or damage. Another misconception is assuming any resistance indicates a problem; some tension is normal. Also, don’t overlook inspecting the string and limbs for wear before cocking, as this prevents accidents.
Finally, always use proper tools or aids designed for your crossbow model. By steering clear of these pitfalls, you maintain control and uphold essential crossbow safety throughout the cocking process.
How to Tell When Your Crossbow Is Fully Cocked
Although cocking your crossbow requires strength and care, knowing exactly when it’s fully cocked is essential for both safety and performance. Understanding crossbow mechanics helps you recognize specific cocking indicators that signal readiness.
Look for these key signs:
- A distinct click or snap indicating the string is locked.
- The safety automatically engaging after full cocking.
- The string resting securely in the trigger mechanism’s sear.
- Cocking indicators like colored marks aligning on the rail.
- Consistent resistance that suddenly releases when fully drawn.
Pay close attention to these cues each time you cock your crossbow. Failing to confirm full cocking risks misfires or mechanical damage. By mastering these indicators, you guarantee your crossbow functions safely and effectively every shot.
Frequently Asked Questions
How Often Should I Wax My Crossbow String?
You should apply wax to your crossbow string every 5-10 shots for ideal string maintenance. Regular wax application prevents fraying and extends string life, ensuring consistent performance and safety during use.
Don’t neglect this essential step.
Can I Use Any Type of Bolt With My Crossbow?
You can’t just grab any bolt type; crossbow compatibility is key. Using the wrong bolts risks damage or poor performance. Always check your manufacturer’s specs to verify your bolts match your crossbow’s design and safety standards.
What Is the Ideal Draw Weight for Beginners?
For beginners, the ideal draw weight is between 75-125 pounds. This range balances power and ease of cocking.
How Do I Store My Crossbow When Not in Use?
Think of your crossbow like a classic car—it needs proper storage to stay pristine. You should store it in a dry, cool place, unloaded and uncocked, to guarantee proper storage and crossbow maintenance.
This helps prevent damage and rust, ensuring your crossbow stays in top condition for years to come.
Are Crossbows Legal for Hunting in All States?
Crossbow regulations vary by state, so you should check local laws before hunting. Not all states allow crossbows year-round; hunting seasons differ, and some restrict crossbow use to specific periods or conditions for safety and fairness.
Always verify the rules in the area where you plan to hunt to ensure compliance with local regulations. This helps avoid legal issues and promotes responsible hunting practices.
Conclusion
Now that you know how to cock your crossbow safely and effectively, remember this: studies show that over 60% of crossbow injuries happen during improper cocking. Taking the time to use the right tools, check your string and cables, and follow proper form isn’t just about accuracy—it’s about your safety.
Always cock with care and precision, and you’ll enjoy better performance without risking injury. Stay focused, stay safe, and shoot straight every time.
Mastering how to cock a crossbow properly is essential for both your safety and success in shooting.