To set up a trail camera, start by choosing a location with frequent animal activity and stable mounting surfaces such as trees.
Position the camera about 3 to 4 feet off the ground to ensure ideal capture angles. Secure the camera firmly to prevent movement.
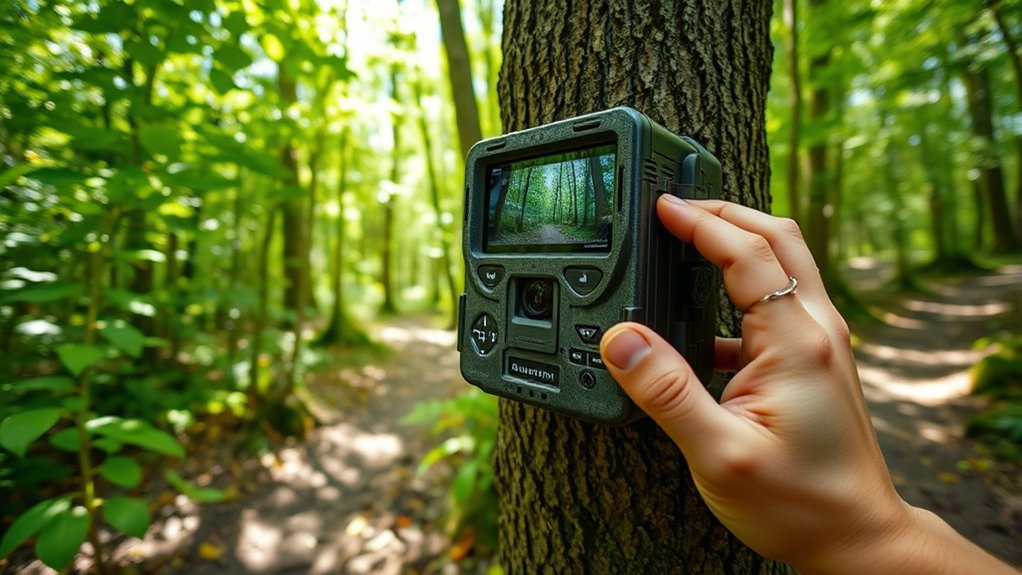
Adjust settings like motion sensitivity to between 70-90% and set the trigger speed to under 1 second for quick activation. Switch to infrared mode to capture clear images during nighttime.
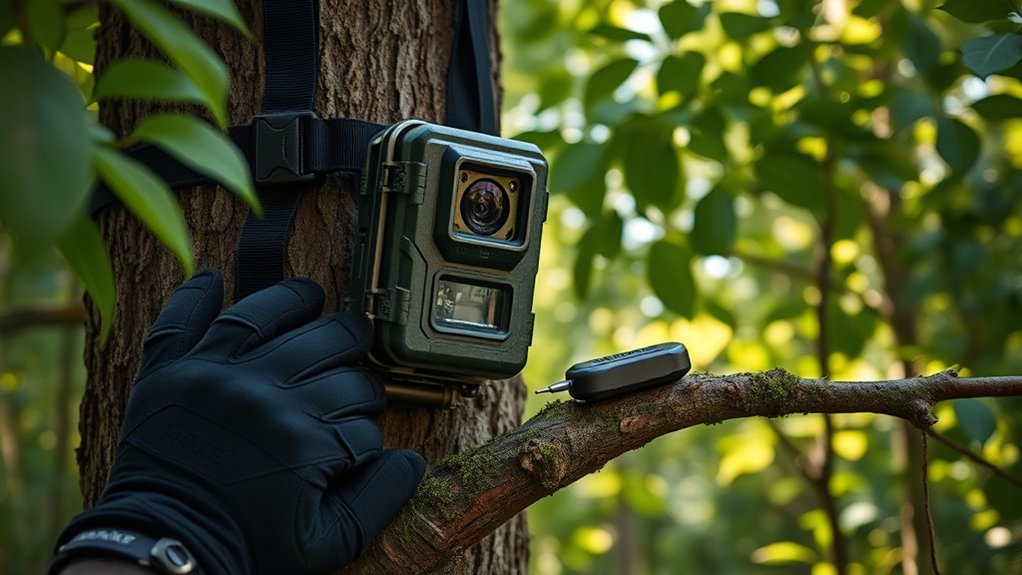
Test the camera by walking nearby to confirm it activates properly.
Regularly organizing and maintaining your camera will help maximize its performance and improve the quality of your data.
For more detailed tips, explore additional resources to enhance your trail camera setup further.
Key Takeaways
- Choose a location with frequent animal activity, like trails, feeding areas, or water sources, and mount the camera 3-4 feet high on stable surfaces.
- Adjust settings for exposure, infrared mode, and trigger sensitivity (70-90%) with a trigger speed under 1 second for effective captures.
- Test camera functionality by checking battery power, cleaning the lens, and walking through the detection zone to confirm activation.
- Transfer and organize images by date, time, and location using consistent naming conventions and back up data regularly to prevent loss.
- Perform regular maintenance by cleaning lenses, checking batteries, inspecting seals, and updating firmware for reliable long-term performance.
Choose the Best Location for Your Trail Camera
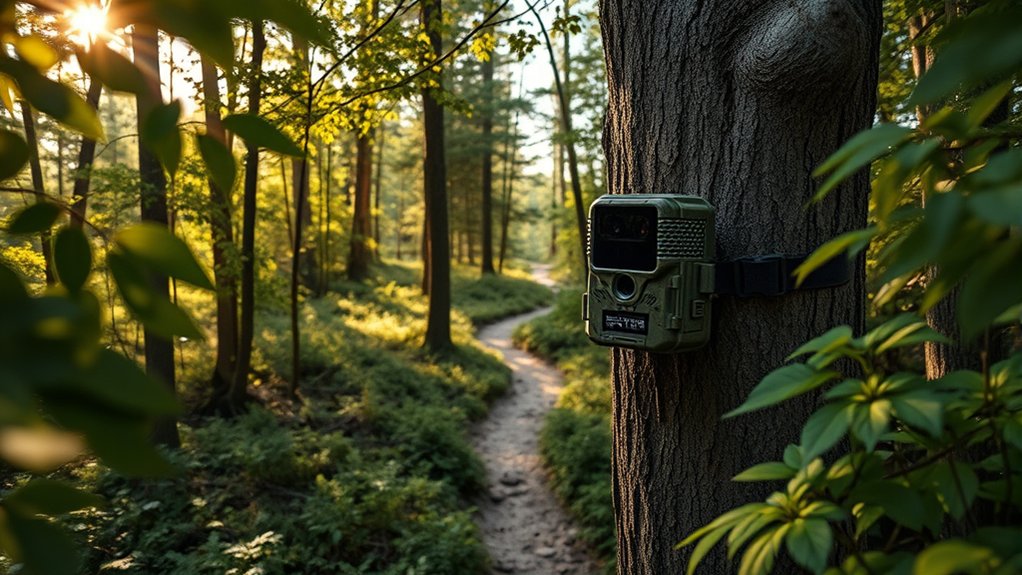
Selecting the best location for your trail camera directly impacts the quality and relevance of the footage you capture. To optimize placement, analyze local wildlife patterns by observing animal trails, feeding sites, and water sources. Position your camera where animal activity is frequent to increase capture rates.
Additionally, assess terrain features such as elevation changes, natural funnels, and cover density; these elements influence animal movement and visibility. Avoid locations with excessive vegetation that may trigger false captures or obstruct the camera’s field of view. Use natural landmarks to orient the camera for maximum coverage and minimal sun glare.
Mount Your Trail Camera Securely at the Right Height
You’ll want to select a mounting spot that offers clear visibility and minimal obstructions. Position your trail camera at the ideal height—typically 3 to 4 feet off the ground—to capture the target animals effectively.
Make certain to fasten the camera securely using straps or mounts to prevent movement and guarantee steady footage.
Choose Optimal Mounting Location
Choosing the ideal mounting location for your trail camera directly impacts the quality and effectiveness of your footage. To capture clear images, position your camera where wildlife patterns are most evident—near game trails, water sources, or feeding areas. Select an ideal environment with minimal vegetation obstructing the lens to prevent false triggers and blurred images.
Avoid locations exposed to direct sunlight or frequent movement of branches, as these can degrade image clarity and battery life. Securely mount the camera on a stable surface, such as a tree or post, ensuring it won’t shift over time. By carefully analyzing animal behavior and environmental conditions, you’ll optimize your trail camera’s placement, resulting in reliable, high-quality wildlife monitoring data.
Determine Proper Camera Height
Mounting your trail camera at the correct height is crucial for capturing clear, usable images of wildlife. Typically, positioning the camera between 2 to 3 feet off the ground aligns with the average height of many animals, optimizing detection and image clarity.
Consider camera angle considerations carefully; a slight downward tilt helps capture full body shots and minimizes false triggers from distant movements. Adjust the height based on the specific wildlife you intend to observe—lower for small mammals, higher for deer or larger animals—to enhance wildlife behavior observation.
Proper height placement guarantees your camera captures relevant activity within its detection zone, improving data quality and minimizing missed opportunities without compromising the field of view.
Secure Camera Firmly
Because a loosely mounted trail camera can shift or fall, securing it firmly is essential to maintain consistent framing and reliable image capture. Start by selecting durable mounting materials such as heavy-duty straps, brackets, or clamps that resist environmental stress and wildlife interference.
Position the camera at the determined height, then fasten it tightly to a stable support, like a tree or post, ensuring no movement occurs when touched. Verify camera stability by gently applying pressure—if it wobbles, readjust or reinforce the mounting.
Use weather-resistant fasteners to prevent loosening over time. Properly securing your trail camera not only preserves the intended field of view but also protects your equipment from damage, maximizing data accuracy and longevity in the field.
Adjust Trail Camera Settings for Day and Night Shots
You’ll need to optimize exposure settings to capture clear images in varying light conditions. Switch to infrared mode for effective night shots without startling wildlife.
Also, adjust trigger sensitivity to balance quick activation with minimizing false triggers.
Optimize Exposure Settings
Although trail cameras automatically adjust to lighting conditions, fine-tuning exposure settings guarantees clearer images during both day and night. Start by adjusting exposure compensation to either increase or decrease the sensor’s sensitivity, which helps prevent overexposed highlights in bright daylight or underexposed shadows at night.
Next, optimize the dynamic range setting to capture a broader spectrum of light intensities, preserving detail in both bright and dark areas. Balancing these parameters is essential since trail cameras often face rapidly changing lighting environments.
Test your adjustments by reviewing sample images under varied conditions and calibrate accordingly. Precise exposure control reduces noise, enhances contrast, and improves overall image quality, ensuring your trail camera reliably records clear, detailed footage regardless of the time of day.
Select Infrared Mode
Adjusting exposure settings sets the foundation for capturing clear images, but managing how your trail camera handles lighting in low-light conditions is equally important. To optimize night shots, select the infrared mode that activates the camera’s infrared technology. This mode emits invisible IR light, enabling effective night vision without disturbing wildlife.
Most trail cameras offer options like black-and-white or color night vision; choose black-and-white for sharper images and longer battery life. Confirm the infrared LED intensity matches your environment—higher intensity works well in open areas, while lower intensity suits close-range coverage to prevent overexposure.
Properly setting infrared mode guarantees your camera captures detailed images both day and night, enhancing monitoring accuracy regardless of lighting conditions.
Adjust Trigger Sensitivity
Since trigger sensitivity determines how your trail camera detects motion, setting it correctly guarantees you capture relevant activity without wasting storage on false alarms. Use trigger adjustment techniques to fine-tune sensitivity for varying environments and lighting conditions. Start by calibrating during both day and night to optimize detection accuracy.
Here are key sensitivity calibration tips:
- Test different sensitivity levels to reduce false triggers from wind or small animals.
- Adjust sensitivity lower in high-traffic areas to avoid constant activation.
- Increase sensitivity in low-activity zones to make sure subtle movements are captured.
Set Your Trail Camera’s Motion Detection and Trigger Speed
To optimize your trail camera’s performance, you’ll need to configure its motion detection sensitivity and trigger speed carefully. Set the motion sensitivity to balance detection accuracy and false triggers, adjusting it based on your environment. The trigger interval controls how quickly the camera resets for another shot after activation—shorter intervals capture rapid movements, while longer ones save battery and memory.
Use the following settings as a guideline:
| Setting | Recommended Value |
|---|---|
| Motion Sensitivity | Medium to High (70-90%) |
| Trigger Interval | 5 to 10 seconds |
| Trigger Speed | Under 1 second |
| Detection Range | 20 to 30 feet |
Fine-tune these parameters to guarantee your camera captures wildlife effectively without excessive false positives.
Test Your Trail Camera to Make Sure It’s Working
After setting your trail camera’s motion detection and trigger speed, you need to verify it functions correctly in the field. Begin by testing the battery to make sure it provides adequate power for extended use. Next, check the lens for any smudges, dirt, or obstructions that could impair image quality.
Finally, perform a real-time test to confirm the camera triggers properly when motion is detected.
To efficiently test your trail camera:
- Test battery voltage with a multimeter or fresh batteries to guarantee longevity.
- Check lens clarity and alignment to avoid blurry or partial images.
- Walk in front of the camera within the detection zone to verify immediate activation and photo capture.
This systematic approach makes certain your trail camera operates reliably before deployment.
Review and Organize Trail Camera Photos Efficiently
When you retrieve your trail camera, organizing and reviewing the collected photos promptly guarantees you efficiently analyze the data. Begin by transferring images to a dedicated digital storage device, ensuring file integrity with checksums or verification tools. Implement a systematic photo organization method: categorize images by date, time, and location, using consistent file naming conventions.
Utilize software that supports batch processing for faster sorting and tagging, making it easier to identify key wildlife activity or anomalies. Regularly back up your digital storage to prevent data loss. Avoid clutter by deleting false triggers or duplicate shots after review.
This structured approach streamlines your workflow, enabling quick access and thorough analysis of your trail camera data, ultimately enhancing your ability to monitor and understand wildlife patterns effectively.
Keep Your Trail Camera Running Smoothly Over Time
Although trail cameras are designed for durability, regular maintenance is essential to guarantee consistent performance and reliable data collection. To keep your trail camera running smoothly over time, focus on these key practices:
Regular maintenance is crucial to ensure your trail camera delivers consistent performance and reliable data over time.
- Clean the lens and sensors regularly to prevent dirt and debris from impairing image quality or motion detection.
- Implement effective battery management by using high-quality rechargeable batteries and checking voltage levels before deployment.
- Inspect the housing and seals for damage or wear to maintain weather resistance and protect internal components.
Frequently Asked Questions
Can I Use Solar Panels to Power My Trail Camera?
Yes, you can use solar panels to power your trail camera. Solar panel benefits include extending battery life by continuously charging it, reducing the need for frequent battery replacements, and ensuring longer, uninterrupted operation in remote areas.
This makes them an excellent choice for outdoor enthusiasts and researchers who require reliable, long-term camera functionality without constant maintenance. Additionally, solar panels are environmentally friendly, utilizing renewable energy to keep your device running efficiently.
How Do I Prevent Animals From Damaging the Camera?
Think of your camera as a knight guarding treasure. You must choose strategic camera placement and equip it with sturdy protective housing to shield it from curious animals.
This ensures your device stays unharmed while capturing valuable footage.
Are Trail Cameras Legal to Use on Private Property?
You can use trail cameras on private property, but you must comply with trail camera regulations and obtain property owner consent.
Always check local laws to guarantee your setup respects privacy and legal boundaries before installation.
What Memory Card Size Works Best for Long-Term Use?
You’ll want a high-capacity SD or microSD card, preferably 64GB to 128GB, to guarantee ample data storage.
Choose Class 10 or UHS-I memory card types for faster write speeds and reliable long-term performance.
Can Trail Cameras Record Video With Sound?
You’ll find some trail cameras record video with sound, capturing crisp audio alongside high video quality.
Check specs carefully, as sound clarity varies; advanced models often include microphones for richer, more detailed environmental recordings.
Conclusion
Setting up your trail camera is like tuning a finely crafted instrument—each adjustment impacts the quality of your shots. Just as a violinist tweaks strings for perfect harmony, you’ll need to carefully choose locations, mount heights, and settings to capture clear images day and night.
Remember, a well-calibrated camera can increase your successful captures by up to 40%. With consistent maintenance and organization, you’ll guarantee your trail camera performs reliably season after season.
By following these steps to set up a trail camera properly, you ensure you get the best possible footage every time.