You’ll want the best trail camera that delivers fast trigger speed (under 0.5 seconds), high-resolution images (12MP+), and reliable night vision with no-glow LEDs for clear, undisturbed wildlife capture.
Battery life is key—lithium or solar options work best, especially in cold or remote areas.
Durable, weather-resistant housing guarantees performance in harsh conditions.
Choosing the right camera depends on your specific needs, so exploring key features and setup strategies will help you optimize wildlife observation.
Key Takeaways
- The best trail camera has a fast trigger speed under 0.5 seconds to capture quick wildlife movements effectively. High-resolution sensors, 12MP or above, with no-glow infrared LEDs provide clear daytime and night images without disturbing animals.
- Durable, weather-resistant housing and long-lasting lithium or solar-powered batteries ensure reliable outdoor performance and minimal maintenance. Wide detection range and sensitive motion sensors help monitor larger areas and minimize false triggers for quality data.
- Easy setup, data retrieval options, and user-friendly interfaces improve workflow efficiency for both beginners and professionals.
How To Choose A Trail Camera For Wildlife Observation?
When selecting a trail camera for wildlife observation, what key factors should you prioritize to assure accurate and efficient data collection? First, consider the species’ typical wildlife behavior, including activity patterns and movement speed, to confirm the camera’s trigger speed and detection range align. You’ll want a model capable of capturing clear images or videos during both day and night conditions relevant to your study area.
Additionally, factor in camera maintenance requirements; a device with long battery life and weather-resistant housing reduces the frequency of site visits, minimizing disturbance to wildlife and data gaps. Reliable storage capacity and ease of data retrieval also streamline your workflow.
Prioritizing these elements enhances your ability to monitor wildlife behavior objectively while maintaining consistent, high-quality data collection over extended periods.
Key Features To Look For In A Trail Camera
Although trail cameras vary widely in design and functionality, certain key features consistently determine their effectiveness for wildlife monitoring. You’ll want to evaluate trigger speed, detection range, and battery life, as these directly impact data collection quality. Motion sensors should be sensitive enough to capture animals without false triggers.
Durable, weather-resistant housing guarantees reliable performance in harsh environments. Reviewing user reviews can provide insight into real-world functionality and any common issues with camera features. Additionally, consider ease of setup and data retrieval options, such as USB or wireless transfer.
While image quality is important, it’s addressed separately; focus here on operational reliability and sensor accuracy. Selecting a trail camera with well-balanced features, validated by user feedback, maximizes your chances of successful wildlife observation.
Comparing Trail Camera Image Quality: Resolution And Night Vision
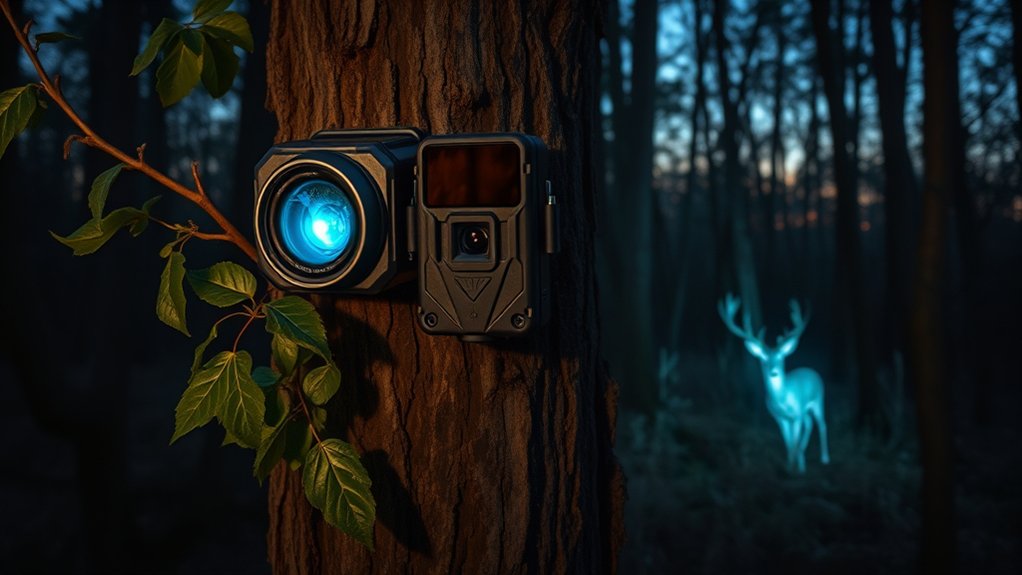
Image quality plays an essential role in accurately identifying wildlife captured by trail cameras, and it hinges primarily on resolution and night vision capabilities. You’ll want to evaluate image clarity, which depends on sensor resolution, and low light performance, critical for nocturnal monitoring.
Higher resolution sensors (12MP and above) produce sharper images, enabling precise species identification. Night vision technology—infrared LEDs or no-glow black LEDs—affects how well the camera performs in darkness without disturbing animals. Here’s a concise comparison:
| Feature | Impact on Image Quality |
|---|---|
| Resolution | Higher resolution improves detail and clarity, aiding identification. |
| Night Vision Type | No-glow LEDs offer better low light performance with minimal disturbance. |
| Sensor Sensitivity | Enhanced sensors capture clearer images in low light conditions. |
Understanding these factors helps you choose a trail camera optimized for superior image quality.
Trail Camera Battery Life And Power Sources Explained
You’ll need to understand how different battery types affect your trail camera’s operational time and reliability. Considering solar power options can extend functionality while reducing maintenance.
Additionally, applying power management tips guarantees you maximize your device’s efficiency in the field.
Battery Types Comparison
When selecting a trail camera, understanding the differences between battery types is essential because they directly impact the device’s operational lifespan and reliability. Battery longevity and battery efficiency vary considerably across options, affecting how long your camera can function without maintenance.
Alkaline batteries provide moderate efficiency but degrade faster in cold conditions. Lithium batteries offer superior longevity and stable performance across temperatures. Rechargeable NiMH batteries have good efficiency and cost-effectiveness but require regular recharging.
| Battery Type | Characteristics |
|---|---|
| Alkaline | Moderate longevity, low cost |
| Lithium | High longevity, temperature resistant |
| NiMH (Rechargeable) | Good efficiency, reusable |
| Lead Acid (External) | High capacity, heavier weight |
Choosing the correct battery type optimizes your trail camera’s performance for extended field use.
Solar Power Options
Battery type directly influences how long your trail camera can operate before needing replacement or recharge, but power sources like solar energy offer an alternative that can extend operational time considerably. Solar power options rely on solar panel efficiency to convert sunlight into electrical energy, which then charges the camera’s internal battery or an external battery pack.
Effective battery integration guarantees that the energy harvested from solar panels is stored and managed efficiently, maintaining consistent camera function even during low-light conditions. When choosing a solar-powered trail camera, assess the solar panel’s wattage, size, and placement, as these factors impact energy capture.
Proper battery integration improves energy retention and discharge rates, making solar power a viable solution for extended deployments without frequent manual intervention.
Power Management Tips
Although trail cameras vary widely in power consumption, managing their energy use effectively can greatly extend operational life. You should focus on power conservation by adjusting settings such as trigger sensitivity and photo intervals.
Opt for energy-efficient models and consider external power sources like solar panels. Regular maintenance checks guarantee peak battery performance and prevent energy loss.
| Power Management Tip | Effect on Battery Life |
|---|---|
| Lower trigger sensitivity | Reduces unnecessary activations |
| Extend photo intervals | Decreases total power usage |
| Use solar power | Supplements battery charging |
Why Trigger Speed And Detection Range Matter For Trail Cameras
You need a trail camera with a fast trigger speed to capture animals the moment they enter the detection zone, minimizing missed shots.
A longer detection range allows you to monitor a wider area, increasing the chances of recording wildlife activity.
Both factors directly affect the quality and quantity of your trail camera’s data.
Trigger Speed Importance
Three key factors determine a trail camera’s effectiveness: trigger speed, detection range, and image capture quality. Trigger speed refers to the time between motion detection and image capture. A faster trigger speed guarantees you don’t miss fast-moving animals, enhancing detection accuracy.
If the trigger speed is slow, the subject may move out of frame before the camera records, resulting in incomplete or missed data. This delay can compromise your ability to monitor wildlife behavior or security effectively. You want a trigger speed under 0.5 seconds for ideal performance, especially in dynamic environments.
Prioritizing trigger speed improves the camera’s responsiveness and reliability, making it an essential specification to take into account when selecting the best trail camera for your monitoring needs.
Detection Range Benefits
Detection range greatly influences a trail camera’s ability to capture relevant wildlife activity by determining how far the sensor can detect motion or heat signatures. When you select a camera with an extended detection range, you increase detection accuracy, allowing it to identify animals at greater distances before they enter the frame.
However, range limitations exist due to sensor technology and environmental factors like temperature and vegetation density, which can reduce effective detection distance. Understanding these constraints helps you position the camera effectively to maximize coverage. Additionally, a broader detection range paired with a fast trigger speed guarantees you don’t miss fleeting wildlife moments.
Ultimately, balancing detection range and speed enhances data quality, providing you with thorough, reliable wildlife monitoring results essential for informed observations and research.
Choosing Durable, Waterproof Trail Cameras For Tough Conditions
Although trail cameras are designed for outdoor use, selecting models with durable, waterproof construction is crucial for reliable performance in harsh environments. You should focus on cameras made from durable materials like reinforced plastics or metal alloys, which resist impact and weathering.
Pay close attention to waterproof ratings—IP66 or higher guarantees protection against heavy rain and dust. These specifications assure your camera functions uninterrupted, regardless of conditions.
| Feature | Importance |
|---|---|
| Durable Materials | Prevent physical damage, extend lifespan |
| Waterproof Ratings | Guarantee resistance to water ingress |
| Sealed Enclosures | Protect internal electronics |
Choosing cameras with these attributes helps you avoid failures and data loss in tough settings, optimizing your outdoor monitoring efforts.
Best Trail Cameras For Budget Buyers
Selecting durable and waterproof trail cameras guarantees reliability, but budget constraints often require balancing these features with cost-effectiveness. When exploring budget options, you should focus on models that deliver essential performance without unnecessary extras.
Affordable features such as moderate resolution, reliable motion sensors, and sufficient battery life can meet basic monitoring needs effectively. Consider these points when choosing:
- Sensor Accuracy: Opt for cameras with proven motion detection range and trigger speed to maximize capture efficiency.
- Image Quality: Select models offering at least 8MP resolution and nighttime infrared capability for clear images under varied lighting.
- Power Source: Prioritize battery life and compatibility with standard batteries to reduce maintenance frequency.
High-End Trail Cameras With Advanced Technology
When you invest in high-end trail cameras, you gain access to cutting-edge technology that considerably enhances monitoring capabilities. These models integrate advanced sensors, such as ultra-sensitive motion detectors and thermal imaging, improving detection accuracy and reducing false triggers. High end features often include higher resolution imaging, faster trigger speeds, and extended battery life, enabling detailed data collection over prolonged periods.
You’ll also find enhanced connectivity options like cellular transmission and Wi-Fi, allowing real-time monitoring and remote configuration. Additionally, ruggedized designs guarantee durability in harsh environmental conditions. By selecting trail cameras equipped with these technologies, you maximize data reliability and operational efficiency, vital for scientific wildlife studies or security applications.
Setting Up Your Trail Camera For The Best Results
To achieve accurate monitoring, you need to position your trail camera at ideal locations where animal activity is frequent and unobstructed. You should also adjust the sensitivity settings carefully to balance between capturing target movement and minimizing false triggers.
Proper setup enhances data quality and extends battery life effectively.
Optimal Camera Placement
Although choosing the right trail camera is important, positioning it correctly plays a crucial role in capturing clear and actionable images. To optimize camera placement, consider these factors scientifically:
- Optimal Height: Position the camera between 3 to 4 feet off the ground. This height aligns with most wildlife’s average body level, improving detection and image clarity.
- Camera Angles: Aim the camera slightly downward at a 15-20 degree angle. This reduces false triggers caused by moving vegetation and enhances subject focus.
- Field of View: Select locations with a clear, unobstructed field of view. Confirm backdrops contrast with subjects to improve image quality and identification accuracy.
Adjusting Sensitivity Settings
Since trail cameras rely on motion sensors to capture images, adjusting sensitivity settings directly influences their effectiveness in detecting wildlife. You should perform sensitivity adjustment to optimize motion detection, balancing between capturing all relevant activity and minimizing false triggers caused by environmental factors like wind or moving foliage.
Start by setting sensitivity to a medium level and test the camera’s response to different stimuli. If the camera misses animals, increase sensitivity incrementally; if it triggers excessively without wildlife presence, decrease sensitivity. Remember, sensitivity adjustment depends on the environment and target species’ size and speed.
Regularly reviewing captured images helps refine these settings. By carefully tuning motion detection sensitivity, you enhance your camera’s reliability and data quality, ensuring you gather accurate wildlife activity records.
Managing And Reviewing Trail Camera Photos Efficiently
When you collect large volumes of images from trail cameras, organizing and analyzing them promptly becomes essential to extract meaningful data. Implementing systematic photo organization and efficient tagging accelerates review and improves data accuracy.
Organizing and tagging trail camera images promptly ensures faster review and more accurate data insights.
To manage your trail camera photos effectively:
- Establish consistent file naming conventions incorporating date and location metadata to streamline sorting.
- Use specialized software or apps that support batch tagging and allow you to categorize images by species, time, or behavior.
- Regularly archive and back up your photo database to prevent data loss and facilitate long-term analysis.
Adhering to these practices guarantees you minimize redundant reviews and quickly identify relevant patterns or anomalies, enhancing your overall data management workflow.
Frequently Asked Questions
Can Trail Cameras Be Used for Home Security Monitoring?
You can use trail cameras as vigilant sentinels for home security, but their monitoring effectiveness varies. They detect motion and record discreetly, yet lack continuous surveillance and advanced alerts typical of dedicated home security systems.
While they are great for capturing unexpected activity, trail cameras do not provide real-time monitoring or instant notifications. This makes them less suitable for comprehensive home security compared to specialized systems.
Are There Legal Restrictions on Using Trail Cameras in Public Areas?
Yes, you must follow legal regulations when using trail cameras on public lands. These rules often restrict placement, recording consent, and privacy protections.
Always verify local laws to guarantee compliance before setting up your equipment.
How Do Trail Cameras Affect Local Wildlife Behavior?
You might observe that trail cameras can induce wildlife stress, potentially altering behavioral patterns like movement and feeding. However, properly placed, non-intrusive cameras minimize disturbance, allowing you to study animals with limited impact on their natural activities.
Can Trail Camera Footage Be Used as Evidence in Court?
You can use trail camera footage as evidence if it meets evidence admissibility standards and avoids legal ramifications. Guarantee the footage is authentic, unaltered, and collected following legal protocols to maintain its credibility in court proceedings.
What Are Common Troubleshooting Tips for Malfunctioning Trail Cameras?
Check your trail camera’s batteries first, as battery issues often cause malfunctions.
Clean and test sensors for proper functioning, ensuring no obstructions or dirt interfere.
Reset settings if sensor malfunctions persist, following manufacturer guidelines carefully.
Conclusion
Choosing the best trail camera hinges on balancing features like resolution, trigger speed, and battery life with your specific needs. For example, a researcher tracking nocturnal animals improved data accuracy by switching to a camera with superior night vision and faster detection.
By understanding these technical aspects and setting up your device correctly, you can optimize wildlife observation and gather reliable, high-quality images for your studies or hobbies.
Ultimately, selecting the best trail camera ensures you capture clear, timely photos that meet your unique wildlife monitoring goals.