To remove your AR-15 barrel, first verify the rifle is unloaded and secure the upper receiver in a vise with protective jaws.
Use an armorer’s wrench to loosen the barrel nut by turning it counterclockwise, applying appropriate torque within 30-80 ft-lbs.
Slide the barrel forward from the receiver, checking for any pins in the way.
Proper lubrication and safety gear are essential throughout.
If you want to master the full process and avoid common pitfalls, keep going.
Key Takeaways
- Ensure the AR-15 is unloaded and securely clamped in a vise with protective jaws before starting barrel removal.
- Use an armorer’s wrench to loosen the barrel nut by applying counterclockwise torque within manufacturer specifications (30-80 ft-lbs).
- Slide the barrel forward out of the upper receiver once the barrel nut is fully loosened and any obstructing pins are removed.
- Inspect the barrel and upper receiver for wear, corrosion, or damage before proceeding with reassembly or replacement.
- Reinstall the barrel by aligning the barrel extension with the upper receiver lug and torquing the barrel nut to spec.
What Tools You Need to Remove an AR-15 Barrel
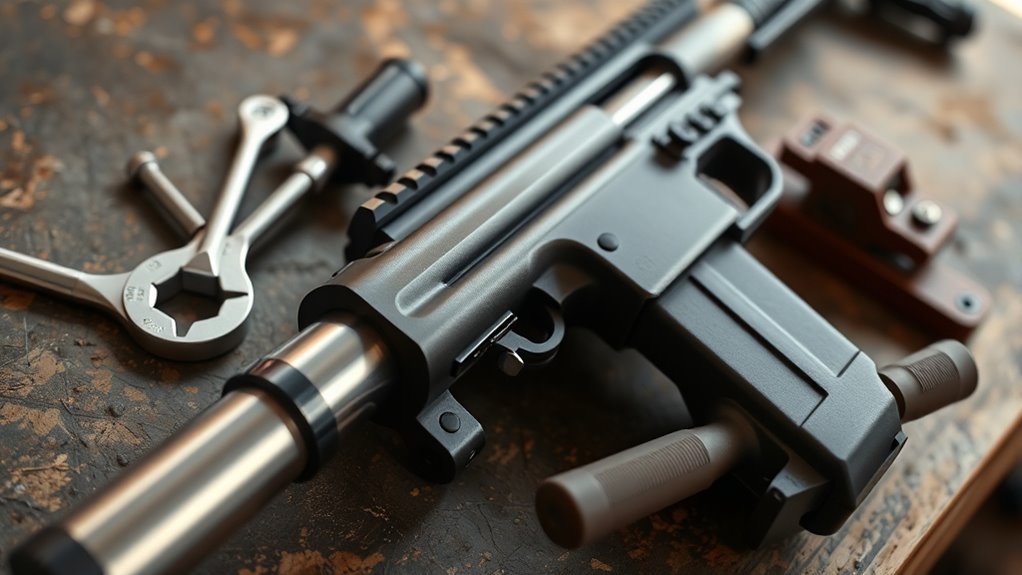
Before you begin removing the AR-15 barrel, you’ll need to gather specific tools to guarantee the process goes smoothly and safely. Essential tools include an armorer’s wrench, which is designed to fit the barrel nut and other components precisely. You’ll also require a sturdy vise with protective jaws to avoid damaging the upper receiver when securing it.
A torque wrench is critical for correctly loosening and reinstalling the barrel nut to specified torque values. Additionally, a punch set and hammer may be necessary for removing pins if your model requires it. Having a cleaning cloth and solvent on hand helps maintain a clean workspace and prevents debris from interfering.
These barrel removal tools form the foundation for safe, efficient barrel disassembly and reassembly.
Getting Your AR-15 Ready for Barrel Removal
Start by verifying your AR-15 is completely unloaded and the chamber is clear to guarantee safety throughout the process. Next, secure the rifle in a stable vise with appropriate clamps to prevent movement during disassembly. Proper barrel alignment is critical; confirm the upper receiver and barrel extension are correctly positioned to avoid damage.
Before loosening any components, apply proper lubrication to the barrel extension threads and the barrel nut interface to reduce friction and prevent galling. Remove any accessories or attachments that might interfere with the barrel removal process. Finally, double-check that you have the correct tools on hand and understand their use.
Following these preparatory steps guarantees a controlled, damage-free barrel removal experience.
How to Remove the AR-15 Barrel Step by Step
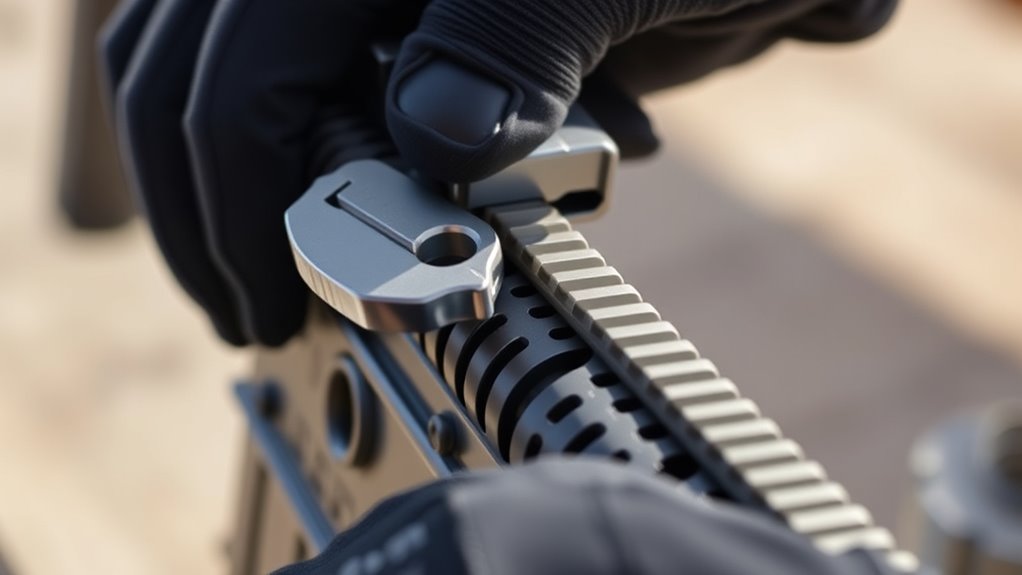
With your AR-15 securely clamped and all preparations complete, you can proceed to loosen the barrel nut. Using an appropriate armorer’s wrench, apply counterclockwise force to break the torque specification initially set during assembly, typically around 30-80 ft-lbs depending on manufacturer guidelines.
Adhere strictly to these torque specifications to avoid damaging barrel threading techniques integral to maintaining a secure fit. Once the barrel nut is loosened, carefully slide the barrel forward from the upper receiver. Take care not to damage the barrel extension or receiver interface.
If the barrel resists, verify no pins or components are obstructing removal. By following these precise steps and respecting torque values, you guarantee safe, effective barrel removal while preserving the integrity of your AR-15’s threading and assembly.
How to Inspect the Barrel and Components After Removal
Once you’ve removed the barrel, carefully examine its surface for signs of corrosion, pitting, or cracks. Pay close attention to the chamber, bore, and gas port to guarantee they’re free of excessive wear or damage.
Additionally, inspect all related components for wear that could affect performance or safety.
Visual Barrel Condition
A thorough visual inspection of the AR-15 barrel and its components is critical after removal to guarantee functionality and safety. Begin by examining the exterior surface for any signs of barrel rust, which can compromise structural integrity and accuracy. Pay close attention to the chamber area and locking lugs, ensuring no corrosion or damage is present.
Next, assess bore cleanliness by shining a strong light through the barrel’s bore; any visible fouling, rust, or pitting must be addressed before reassembly. Also, inspect the gas port for obstructions or residue buildup that could affect cycling. Confirm that the barrel threads are free of damage or debris, as this is essential for secure attachment.
This precise visual evaluation helps maintain peak performance and extends the barrel’s service life.
Component Wear Assessment
Three critical areas deserve your immediate attention when evaluating component wear on the AR-15 barrel after removal: the barrel extension, gas system components, and locking lugs. Conduct a thorough barrel inspection focusing on identifying unusual wear patterns that could indicate stress or improper fit.
Specifically, look for:
- Barrel Extension: Check for cracks, deformation, or erosion around the locking lugs.
- Gas System Components: Inspect the gas block and gas tube for carbon buildup, corrosion, or pitting.
- Locking Lugs: Assess for uneven wear or rounding that may affect headspace and lockup integrity.
Document any deviations from standard wear to determine if replacement or further maintenance is necessary. A precise component wear assessment guarantees reliability and safety before reassembly.
How to Reinstall or Replace the AR-15 Barrel
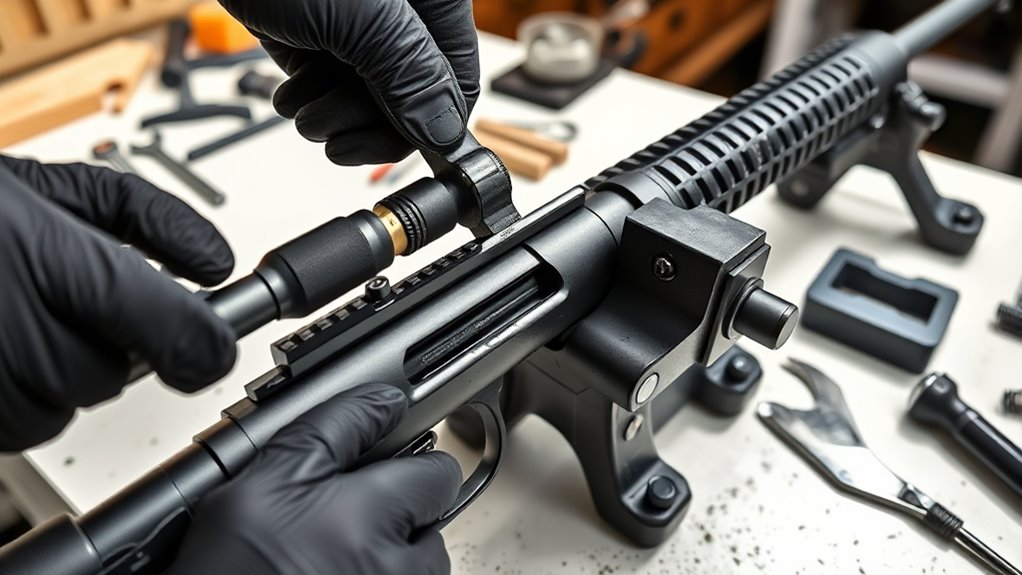
Begin by verifying the upper receiver and barrel extension are clean and free of debris to guarantee proper fit and function. Align the barrel extension with the upper receiver lug precisely before inserting the barrel into the receiver. Use barrel installation tips such as verifying the barrel is fully seated to avoid misalignment.
Once positioned, secure the barrel nut hand-tight, then torque it to the manufacturer’s recommended torque specifications—typically between 30 to 80 ft-lbs—using a calibrated torque wrench. Apply a thread locker if specified. Confirm proper gas tube alignment before final tightening.
Reinstall the gas block and verify all components are correctly oriented. Following these steps with attention to detail guarantees reliable performance and safety in your AR-15’s barrel replacement or reinstallation.
Troubleshooting Common AR-15 Barrel Removal Issues
Although removing an AR-15 barrel is typically straightforward, you may encounter challenges such as a seized barrel nut, stripped threads, or misaligned components. Addressing these stubborn components requires precise troubleshooting to maintain proper barrel alignment and prevent damage.
Apply penetrating oil on the barrel nut and allow time for loosening seized parts. Inspect threads carefully; use a thread chaser or tap to restore stripped threads before attempting removal. Verify barrel alignment visually and with gauges; misalignment can cause binding and complicate removal.
Know When to Call a Pro for Barrel Removal
If you encounter complex barrel issues or lack specialized tools, it’s critical to recognize when professional assistance is necessary. Incorrect removal can compromise your AR-15’s integrity and pose safety risks.
Don’t hesitate to consult an expert to guarantee the job is done correctly and safely.
Complex Barrel Issues
When dealing with complex barrel issues, such as damaged threads, seized barrels, or specialized barrel profiles, you’ll often require professional assistance to secure safe and effective removal. Attempting to force removal without the proper expertise can compromise barrel alignment and lead to improper torque specifications during reassembly, affecting accuracy and safety.
Professionals use precise techniques and equipment to address:
- Thread damage that prevents normal barrel detachment
- Barrels fused by corrosion or overtightening
- Unique barrel profiles requiring specialized handling
Knowing your limits is critical. If you encounter resistance beyond standard torque or notice misalignment risks, it’s best to consult a gunsmith. Their expertise secures the barrel is removed without damaging the upper receiver or affecting the rifle’s performance.
Specialized Tools Required
Specialized tools are essential for safely and effectively removing an AR-15 barrel, especially in cases involving tight torque settings or non-standard barrel designs. You’ll need a proper barrel wrench designed to engage the barrel nut without damaging the receiver or barrel. This tool allows you to apply the necessary force accurately while respecting the manufacturer’s torque specifications.
Attempting removal without the correct barrel wrench risks stripping components or compromising the firearm’s integrity. If you don’t have access to these specialized tools or aren’t confident in interpreting torque specifications, it’s wise to consult a professional gunsmith. They possess the precise instruments and expertise required to handle complex barrel removals, ensuring the process is done correctly and without causing damage.
Safety Concerns Awareness
Having the right tools is only part of safely removing an AR-15 barrel; understanding the risks involved is equally important. You must prioritize proper safety gear and strict firearm handling protocols to prevent accidents or damage.
If you encounter resistance during barrel removal, or lack experience with torque specifications and barrel nuts, it’s wise to consult a professional gunsmith.
Be aware of these critical safety concerns before proceeding:
- Inadequate safety gear can lead to injury from slips or tool failures.
- Improper firearm handling risks accidental discharge or damage to the firearm.
- Lack of technical knowledge may cause irreversible damage to barrel threads or the receiver.
Knowing when to call a pro guarantees safe, precise, and damage-free barrel removal.
Maintaining Your AR-15 After Barrel Removal
Although removing the barrel is a critical step, maintaining your AR-15 afterward guarantees its reliability and longevity. Begin by performing thorough barrel cleaning to remove carbon buildup, fouling, and debris that accumulate during firing. Use appropriate solvents and brushes designed for AR-15 barrels to secure effective residue removal without damaging the rifling.
After cleaning, apply precise lubrication techniques on the barrel extension, gas rings, and locking lugs to reduce friction and prevent corrosion. Make sure your lubricant is suitable for high-temperature environments typical of firearm operation.
Reassemble components carefully, inspecting for wear or damage. Regular maintenance following barrel removal not only preserves the firearm’s accuracy but also enhances operational safety. Staying meticulous with cleaning and lubrication secures your AR-15 performs consistently and extends its service life.
Frequently Asked Questions
What Is the Average Lifespan of an AR-15 Barrel?
You can expect an AR-15 barrel to last around 5,000 to 15,000 rounds.
Regular barrel maintenance tips and watching for barrel replacement signs like accuracy loss help guarantee peak performance and timely replacement.
Can Different Barrel Lengths Affect Accuracy?
Yes, different barrel lengths affect accuracy by altering bullet velocity and interacting with barrel twist rates. Longer barrels generally increase velocity, improving stability.
However, ideal accuracy depends on matching the twist rate to bullet weight and velocity precisely.
How Does Barrel Material Impact Performance?
Like a conductor directing an orchestra, barrel material guides your bullet’s path. Steel offers durability, aluminum reduces weight, and carbon fiber combines both, enhancing heat dissipation and impact resistance.
Ultimately, this combination refines your AR-15’s performance precision.
Are There Legal Restrictions on AR-15 Barrel Lengths?
Yes, you’ve got to follow barrel regulations strictly. Barrel length classification determines legal status—barrels under 16 inches are regulated under the National Firearms Act.
What Barrel Coatings Improve Corrosion Resistance?
You’ll find ceramic coatings and nitride treatment greatly improve corrosion resistance on AR-15 barrels.
Ceramic coatings provide a hard, heat-resistant layer, while nitride treatment enhances surface durability and corrosion protection through chemical diffusion processes.
Conclusion
Removing your AR-15 barrel might seem like dismantling the world’s toughest puzzle, but with the right tools and steps, it’s completely manageable. Always make sure your rifle is unloaded and your workspace is secure before starting.
Precision during removal and inspection guarantees your firearm’s reliability and safety. If you hit snags beyond basic troubleshooting, don’t hesitate to call a professional.
Proper maintenance after barrel removal will keep your AR-15 performing at peak precision for years to come. Following these guidelines ensures a smooth and safe process when you remove your AR-15 barrel.